Snail Pattern Sushi
1.
The basic tools needed are shown in the figure
2.
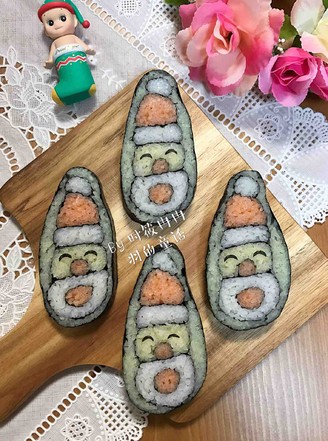
Combining some of the comments below, let me explain in step 2, the finished product is shown in the figure. The following steps start with how each part is formed, and step 12 is the combination of content. To combine, the parts must be completed , Can be combined, please be patient and watch it, I really don’t understand, I have tried my best, there are still some friends who can understand the work column, I can only help here. Thank you all for your collection!
3.
2 mini fish intestines
4.
Need 4 slices of cut seaweed and 2 slices of one-eighth seaweed
5.
First wrap the mini fish intestines with one-eighth of the seaweed to complete two servings!
After wrapping, the closed side faces down so that the seaweed can fit together
6.
Take a slice of seaweed in half and spread it with salmon vinegar rice. Spread the salmon vinegar rice over the dotted line
7.
Roll up from the side with vinegar rice
8.
The side view after the roll is rolled, and the roll is closed and fixed downward
9.
Next, make the body part of the snail, take half a slice of seaweed, and spread it with yellow vinegar rice.
This part of the rice will have different thicknesses. The first half needs to be spread with a thicker vinegar rice, and the second half only needs a thin layer of vinegar rice. There is a transition in the middle, and the rice should be evenly distributed.
10.
The remaining two pieces are cut in half and glued together with a small amount of vinegar rice to become a whole piece of seaweed
11.
Place a layer of white vinegar rice in the middle of the spliced seaweed, and then prepare the yellow sushi roll before putting it on.
The body of the snail needs to be erected, so fill the part close to the yellow sushi with white vinegar rice to fix the body part. as the picture shows
12.
Then put the previously rolled sushi one by one
13.
Then fill the periphery with white vinegar rice, the same, you need to spread the vinegar rice evenly.
One side of the snail shell should also be fixed with vinegar rice, and it’s covered little by little.
Finally, you can close the mouth, wrap the seaweed roll around the entire sushi, wrap it tightly with a sushi curtain, set the shape, let it sit for a while, and then cut it.
14.
Finally, cut the sushi rolls. The noodles need to be moistened so that it is easy to cut. It will be very nervous and pleasantly surprised if you cut it down.
15.
You can cut the expression any way you want. Stick it in the right place
16.
Finished product ~ small snail sushi
Tips:
1. The vinegar rice should be evenly distributed, not more than half and less than half
2. Every time the sushi is rolled, it needs to be rolled with a rolling curtain + fixed shaping, this step cannot be omitted
3. When cutting sushi rolls, the knife surface needs to be moistened so that it is easy to cut. In addition, you need to wipe the knife surface with a damp cloth every time you cut.
The cover video has a time limit and can only be put together at a faster speed. Please watch it together with the step diagram. I feel quite detailed. If I still don’t understand it, I have tried my best...