Honeycomb Cheesecake

by Dream peach

4.8 (1)
Favorite
8

Difficulty

Normal

Time

2h

Serving

2

Honeycomb cake, the material is popular, the taste is silky, dig a spoonful to taste, full of happiness. And the honeycomb pattern on the surface of the cake, I use the packaging plastic bubble film I received from the express to decorate the honeycomb, the finished product comes out, and it is delicious!
(Note: The cake is 6 inches, and the yellow surface is the color on the cooked pumpkin puree. If you have yellow pigment, you can add three or four drops of yellow pigment to avoid pumpkin puree)"
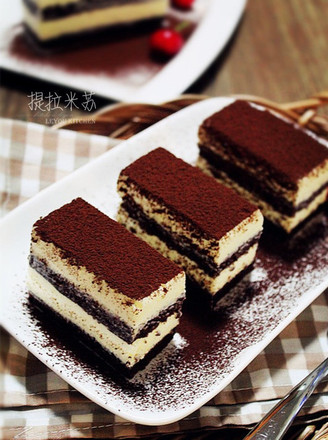
Honeycomb Cheesecake

1. materials needed.

2. First, wash the bubble plastic mold, use a 6-inch live bottom cake mold film, draw a size circle on the side without bubbles, and cut it out with scissors.

3. Remove the filling of the Oreo biscuits, put them in a fresh-keeping bag, and use a rolling pin to crush them into a powder.

4. Put the biscuits in a bowl, add the melted butter and mix well.

5. Put it in a 6-inch live-bottom cake mold, flatten and compact, and freeze for 10 minutes in the refrigerator.

6. Take a clean basin, stir the mascarpone cheese insulation water until no particles are smooth, take it out, add 20 grams of honey, mix and mix well.

7. Add the gelatine powder to 25 grams of cold boiled water and stir thoroughly through hot water until no particles become gelatine liquid.

8. Then pour the gelatin liquid into the cheese paste and mix well to form a mousse filling.

9. Put 300 grams of Nestle cream and 35 grams of granulated sugar in a relatively large drying basin, and use an electric whisk to beat until 6 to distribute.

10. Then mix the cheese mousse filling and cream and mix well.

11. Take out the frozen base of Oreo cookies.

12. Pour two-thirds of the mousse filling and smooth it out, put it in the refrigerator for 30 minutes.

13. Add a few drops of edible yellow pigment or 30 grams of cooked pumpkin puree to the remaining mousse filling, mix well and form a yellow paste.

14. Take out the refrigerated mousse and pour in the yellow mousse paste.

15. Cover the pre-cut bubble plastic mold, gently flatten the bubble side with the cake batter, and put it in the refrigerator for more than 3 hours.

16. Take out the refrigerated cake and gently take out the bubble plastic film.

17. Finished product.

18. Cut a piece and taste slowly. (The remaining few biscuits were also thrown into the cake by me)

19. Dig a spoonful of it and taste smooth ~ full of happiness.

Tips:

1. The sweetness of the cake is moderate, and there is no need to change the amount of sugar.
2. Haha! It is found that the new version of Meitianfa's recipes is more user-friendly. Great πŸ‘

Comments

Similar recipes

Tiramisu Mooncake

Egg, Caster Sugar, Low-gluten Flour

Tiramisu Mooncake

Low-gluten Flour, Caster Sugar, Egg

Tiramisu

Egg, Low-gluten Flour, Cocoa Powder

Tiramisu

Egg Yolk, Caster Sugar, Light Cream

Tiramisu

Mascarpone Cheese, Animal Whipped Cream, Milk

Tiramisu

Finger Biscuits, Light Cream, Mascarpone Cheese

Strawberry Tiramisu [first Taste Diary]

Mascarpone Cheese, Light Cream, Rum

Potted Tiramisu

Cake, Mascarpone Cheese, Milk