Homemade Watermelon Wine
by JZLWWWWWW
Favorite
Difficulty
Easy
Time
48h
Serving
2
Why do you want to make watermelon wine? Watermelon juice will naturally produce more wine.
The wine contains a certain concentration of alcohol, and I am always a little worried about the wine I bought. I don't know how the alcohol comes from. We have found cases of fake brand dry red here. Making your own wine can ensure that every degree of alcohol is brewed by hand.
I don't know the quality of wine, just because it can promote blood circulation. Working in front of the computer for a long time will not only affect the eyesight, but also the cervical spine, which will directly affect the blood supply to the head. It is good to drink a small amount of fruit wine. Only look for a kind of wine that is too monotonous, drink everything and change the taste.
We personally don't have testing equipment, and we don't know what the alcohol content will be after it is done. It doesn't matter, it won't be too high, and the sugar will be more than ten degrees after adding twice. Generally, it should not be stored for too long. If the conditions happen to be suitable, fortunately to make a high-quality wine, you can keep it for a while longer.
Materials:
The practice of Ningxia selenium melon and white sugar:
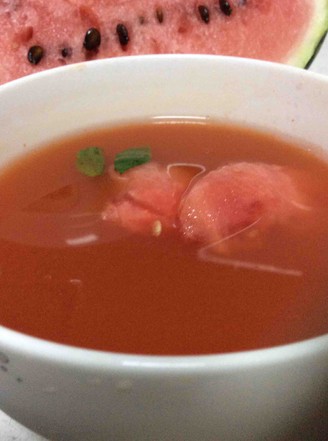
Chop the watermelon with a knife, remove the seeds and bottle it, seven or eighth full;
Add a few grape skins filtered out for wine and press into the center of the bottle;
Screw on the bottle cap, no need to tighten it too hard, keep it at room temperature;
Add sugar for the first time after bubbles appear, and add sugar for the second time after bubbles weaken;
Open the bottle cap two or three times a day, and use a clean spoon to press the floating watermelon into the juice;
I used this for 9 days. Make it on No. 17, add sugar for No. 18 once, add sugar for No. 19 for the second time, the bubbles on No. 26 are obviously reduced, filter and bottle for secondary fermentation;
It needs to be sealed during the second fermentation and can be drunk after one month. "
The wine contains a certain concentration of alcohol, and I am always a little worried about the wine I bought. I don't know how the alcohol comes from. We have found cases of fake brand dry red here. Making your own wine can ensure that every degree of alcohol is brewed by hand.
I don't know the quality of wine, just because it can promote blood circulation. Working in front of the computer for a long time will not only affect the eyesight, but also the cervical spine, which will directly affect the blood supply to the head. It is good to drink a small amount of fruit wine. Only look for a kind of wine that is too monotonous, drink everything and change the taste.
We personally don't have testing equipment, and we don't know what the alcohol content will be after it is done. It doesn't matter, it won't be too high, and the sugar will be more than ten degrees after adding twice. Generally, it should not be stored for too long. If the conditions happen to be suitable, fortunately to make a high-quality wine, you can keep it for a while longer.
Materials:
The practice of Ningxia selenium melon and white sugar:
Chop the watermelon with a knife, remove the seeds and bottle it, seven or eighth full;
Add a few grape skins filtered out for wine and press into the center of the bottle;
Screw on the bottle cap, no need to tighten it too hard, keep it at room temperature;
Add sugar for the first time after bubbles appear, and add sugar for the second time after bubbles weaken;
Open the bottle cap two or three times a day, and use a clean spoon to press the floating watermelon into the juice;
I used this for 9 days. Make it on No. 17, add sugar for No. 18 once, add sugar for No. 19 for the second time, the bubbles on No. 26 are obviously reduced, filter and bottle for secondary fermentation;
It needs to be sealed during the second fermentation and can be drunk after one month. "