Snowy Mooncake

Snowy Mooncake

by Yuchi Pink

4.8 (1)
Favorite

Difficulty

Easy

Time

2h

Serving

4

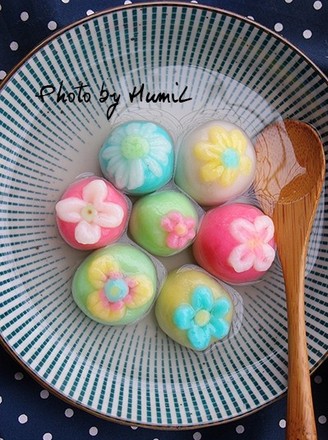
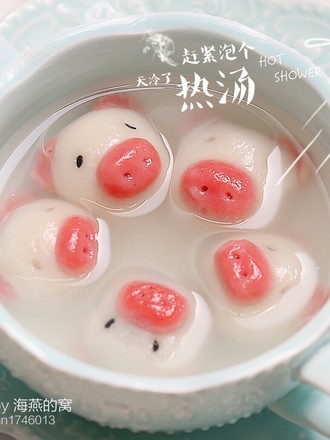
I made a patterned snowy mooncake at home today. The recipe is very good this time. It is the best snowy mooncake I have ever used. It tastes very good and is super Q. This time, I added cocoa powder, matcha powder and red yeast rice powder, together with the original white color. There are four colors in total. The finished product is super beautiful. The skin of the snowy mooncake made this time is very Q. After it is steamed, stir it up and let it cool in the refrigerator. The taste of the snowy mooncake is very Q.
Haha, the four-color snowy mooncakes made this time are super delicious, beautiful, and gorgeous. My husband asked me to make more. He is going to give it away.

Snowy Mooncake

1. Mix sugar, milk, condensed milk, salad oil

Snowy Mooncake recipe

2. All the powder is mixed, sieved, and added to the mixture

Snowy Mooncake recipe

3. Stir well

Snowy Mooncake recipe

4. Sift the mixed batter twice and let stand for 30 minutes

Snowy Mooncake recipe

5. Put it in the steamer

Snowy Mooncake recipe

6. When steaming, cover with a plate to prevent steam from entering. Steam for 25 minutes left

Snowy Mooncake recipe

7. After steaming, take it out and stir

Snowy Mooncake recipe

8. I threw the dough into the cooker while it was hot and stirred for 5 minutes. Knead until smooth and elastic

Snowy Mooncake recipe

9. Take out a quarter of the dough and add cocoa powder

Snowy Mooncake recipe

10. Knead evenly to form cocoa dough

Snowy Mooncake recipe

11. Add matcha and red yeast rice in turn to make green dough and pink dough. The remaining white is also rounded.

Snowy Mooncake recipe

12. Put it in a fresh-keeping bag and put it in the refrigerator for more than one hour.

Snowy Mooncake recipe

13. Divide the red bean paste into 25 grams each. The other skins are also divided into 25 grams

Snowy Mooncake recipe

14. Roll out a leather bag and stuff it

Snowy Mooncake recipe

15. Round

Snowy Mooncake recipe

16. Roll the balls with the cake flour, sprinkle the cooked flour in the mold, and pour out the excess. Put the ball into the mold

Snowy Mooncake recipe

17. Press down firmly and push out the mooncake

Snowy Mooncake recipe

18. You can also use other color dough and put it on the flower petals of the mold

Snowy Mooncake recipe

19. Put another color of dough into it

Snowy Mooncake recipe

20. The pressed moon cake is a trick, you can use it to your heart's content. What tricks you want to do is based on the mold and your own creativity.

Snowy Mooncake recipe

21. Finished product.

Snowy Mooncake recipe

22. Finished product.

Snowy Mooncake recipe

23. Finished product.

Snowy Mooncake recipe

24. Finished product.

Snowy Mooncake recipe

Tips:

After steaming, kneading evenly and well is the key to the fineness and Q of the snow skin. You can use a chef's machine to stir, which is not afraid of scalding, and saves trouble. After the dough is kneaded, refrigerate for more than one hour, making it more chewy and easier to handle. This recipe is basically non-sticky during operation. I have the same ratio of filling and crust. I feel that too much filling is easy to reveal, which affects the appearance.

Comments

Similar recipes

Fried Crispy Dumplings

Quick Frozen Rice Ball, Vegetable Oil, Egg

Glutinous Rice Balls

Glutinous Rice Flour, Water, Peanut Kernel

Glutinous Rice Balls

Peanut Kernel, Walnut, Cooked Sesame

Pumpkin Gnocchi

Pumpkin, Red Bean Paste, Glutinous Rice Flour

Cat's Claw Gnocchi

Glutinous Rice Flour, Warm Water, Red Velvet Liquid

Flower Dumplings

Glutinous Rice Flour, Black Sesame Filling, Salt

Fun Glutinous Rice Balls

Glutinous Rice Flour, Matcha Powder, Red Bean Paste

Sour Soup Sweet Potato Balls

Sweet Potato, Glutinous Rice Flour, Vegetable Oil