#aca烤明星大赛#mango Cream Cake
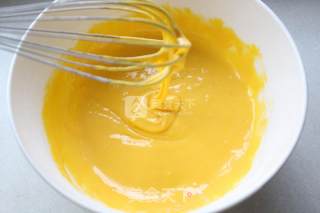
1. Separate the egg yolk and egg white, put them in a clean water-free basin, put the powdered sugar in the egg yolk, stir gently, add the salad oil three times, stir evenly each time, then add the milk and stir evenly, sift into the bottom ribs Flour, stir into a uniform egg yolk paste;
2. Drop a few drops of white vinegar into the egg whites, beat them at low speed until the fish eye bubbles, add powdered sugar in three times to beat the egg whites until hard foaming, lift the egg beater and the egg whites show upright sharp corners;
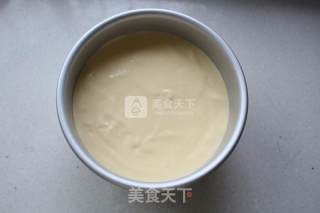
3. Take one-third of the egg white and add it to the egg yolk paste, use a rubber spatula to stir up from the bottom, then add one third of the egg white to the egg yolk paste, stir evenly with the same method, then pour the egg yolk paste into the rest In the egg whites, stir evenly with the same method to form a delicate cake batter. Do not stir in circular motions to prevent the egg whites from defoaming;
4. Pour the cake batter into the mold at a higher position (so that bubbles are not easy to produce), smooth, shake twice to remove large bubbles;
5. Put it in the oven and bake at 130°C for half an hour, then turn to 160°C and continue to bake for half an hour;
6. After being out of the oven, shake it on the table to remove the hot air, and immediately cool down. After cooling, the cake will be demoulded, and then the cake will be divided into three equal pieces;
7. Prepare the mango pulp that you need;
8. Add 60g sugar to the whipped cream, and beat it in an ice water bath until it is very thick;
9. Take a piece of cake, spread a layer of cream, and spread the mango flesh;
10. Spread a layer of cream on the mango flesh, cover with a piece of cake, and press lightly;
11. Spread cream on the cake slice, spread the mango flesh, and spread a layer of cream on the mango flesh, cover the last slice of cake, press lightly, and then use the cream to smear the edge and top of the cake with light cream, use The spatula should be smoothed as much as possible;
12. Put the remaining whipped cream into the piping bag, squeeze the pattern on the sides and top with the cherry blossom-shaped piping mouth, and then decorate with blueberries~
Tips: 1. Try to do all the quasi-work as far as possible before sending whipped cream to decorate the flowers, so as not to be in a hurry;
2. The whipped cream will be better to be whipped if refrigerated for more than 12 hours. The cream whipped in an ice water bath is delicate and has better stability!


 Buy on JD
 Buy on Amazon