

Coconut Bread
by chriszhou
Favorite
Difficulty
Hard
Time
2h
Serving
2
1. Stir the yeast with a little water of about 30 degrees and settle for a while, then pour it into the bread ingredients except butter and milk and mix well. Pour the milk into the flour in portions, and then use chopsticks to stir it into a flocculent shape.


2. Put the dough on the chopping board and keep kneading it.


3. The dough at this time is very sticky and the surface is not smooth. (Be sure to keep kneading, don't just add flour, as long as you keep kneading, the dough will become smooth.) If the flour sticks to the cutting board, use a plastic scraper to scoop up and continue kneading.


4. I have been rubbing on the chopping board for the first 15 minutes. Gradually, the dough began to become smooth, elastic and not sticky.


5. When the operation reaches a certain level, try to open the dough. At this time, the dough can be opened, but when many cracks are removed, add the softened butter to the dough, and then knead the dough vigorously again.


6. Slowly, the dough was kneaded more and more smooth and elastic. Timely test the strength of gluten. If the dough can hold up a thin film, but it is not particularly tough, it will still break easily. When the broken hole is irregularly shaped, it has reached the expansion stage.


7. At this time, put the dough in a large basin and cover with plastic wrap to ferment. (I put it in the oven set to 40 degrees for fermentation)


8. When the fermentation reaches 2.5 times the size, the dough can be taken out, and then the air can be discharged.


9. After the dough is divided into small doughs of uniform size, the intermediate fermentation is carried out for 15 minutes.


10. When fermenting in the middle of these 15 minutes, mix all the ingredients of the coconut filling and the softened butter, stir well and set aside.


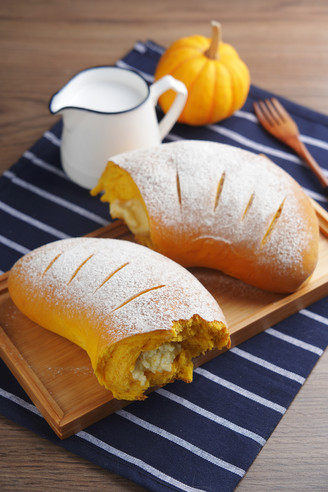
11. After the intermediate fermentation is completed, take a dough, roll it into an oval shape, put in coconut filling, wrap the dough, and roll it out into an oval shape with the mouth facing down.


12. Make a vertical cut on the oblong dough, cut off one end, and then twist the two ends like twisting, and finally pinch the two ends.


13. Put the shaped dough into a baking tray lined with greased paper for the second fermentation (the best fermentation environment: temperature 35-38 degrees, humidity 85%, I put a bowl with boiling water in the oven to increase the humidity, then The oven is still open at 35 degrees).


14. When the bread dough is twice as large as it is fermented, coat it with egg liquid, put it in a preheated oven, and bake it for about 10 minutes at 180 degrees, until the bread surface is golden brown. (I have a large oven, so the time may be shorter. The first time I bake it according to the recipe for 15 minutes, the result is a bit burnt. So the specific baking time depends on the oven.)


Tips:1. Don't stir yeast with overheated water, too hot yeast will be scalded to death.
2. The dough is very wet when you start to knead, do not add flour easily at this time, otherwise it will affect the bread making.
3. It must be fully fermented. I didn't know before. I didn't know how to make bread before the fermentation was completed. The bread that came out was stiff and had a very bad taste, which made me afraid to make bread for a while.
4. If the temperature at home is not enough, you can put the dough in the oven to ferment, I set the temperature to 40 degrees, and the fermentation is completed in one and a half hours.
5. There are also requirements for humidity during the second fermentation, so you can put a bowl with boiling water in the oven to increase the humidity.
6. Each oven has a different oven, so you can control the specific baking time yourself, and you can get it out when you see the golden surface of the bread.






 Buy on JD
 Buy on Amazon