Cute Panda CookiePin this image

Cute Panda Cookie

by Turn around and fall in love with the cook

5.0 (1)
Favorite

Difficulty

Easy

Time

1h

Serving

2

I saw a panda mold on the Internet, and I quickly bought it. I started working immediately after receiving the goods. The finished product looks very cute. Both adults and children love it. If you have a baby, you might as well do it with your baby, so that you can develop your baby’s Chile and exercise your baby’s organizational and design abilities. "

Cute Panda Cookie

1. Prepare all ingredients;

Cute Panda Cookie recipePin this image

2. Soften the butter at room temperature, add powdered sugar, and beat with a whisk until the butter is fluffy;

Cute Panda Cookie recipePin this image

3. Beat the eggs and add them to the butter in portions (set aside 1 egg white for sticky biscuits), beat until fully integrated;

Cute Panda Cookie recipePin this image

4. Divide the whipped cream into two equal parts, add 120g low-gluten flour and 20g cocoa powder to one part of the cream paste and knead well;

Cute Panda Cookie recipePin this image

5. Add 120g low-gluten flour and 20g milk powder to a cream paste and knead well;

Cute Panda Cookie recipePin this image

6. Wrap the dough with plastic wrap and put it in the refrigerator for 30 minutes;

Cute Panda Cookie recipePin this image

7. After taking out the refrigerated dough, roll the cocoa dough into a thickness of about 3 mm with plastic wrap, and press it into a shape with a mold;

Cute Panda Cookie recipePin this image

8. Roll the original dough into a thickness of about 3 mm with a plastic wrap, and press it into a panda face shape with a mold;

Cute Panda Cookie recipePin this image

9. Use egg white as a binder to assemble the panda assembly;

Cute Panda Cookie recipePin this image

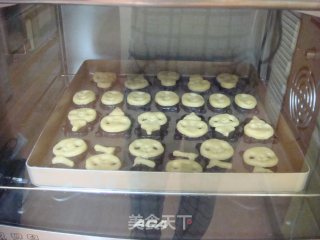
10. Put the prepared biscuits into the baking tray and put them in the preheated oven at 160° for about 20 minutes.

Cute Panda Cookie recipePin this image
Tips:

1. The production method is simple and very suitable for hands-on with the baby;

2. First use the black frame to carve out the shape of the cocoa noodles, use the seal to carve the expression on the white noodles, use the contour mold to carve the face and body, and then use 3 to glue the egg whites on top of the 1 to enter the oven.

Comments

Similar recipes

Sausage and Vegetable Scones recipe

Sausage and Vegetable Scones

Low-gluten Flour, Corn, Butter
Soup Type Soft Bread recipe

Soup Type Soft Bread

Milk Powder, Low-gluten Flour, Salt
Seasonal Vegetable Patties [baby Food Supplement] recipe

Seasonal Vegetable Patties [baby Food Supplement]

Minced Meat, Low-gluten Flour, Shiitake Mushrooms
Seasonal Vegetable Tempura recipe

Seasonal Vegetable Tempura

Onion, Eggplant, Dried Shiitake Mushrooms
Potato and Bacon Melaleuca recipe

Potato and Bacon Melaleuca

Potato, Milk, Bacon
Tyrannosaurus Spinach Bread recipe

Tyrannosaurus Spinach Bread

Low-gluten Flour, Egg, High-gluten Flour
Vegan Banana Cakes recipe

Vegan Banana Cakes

Low-gluten Flour, Whole Wheat Flour, Coffee Powder
Pumpkin Cranberry Bread recipe

Pumpkin Cranberry Bread

Pumpkin Puree, Low-gluten Flour, Egg