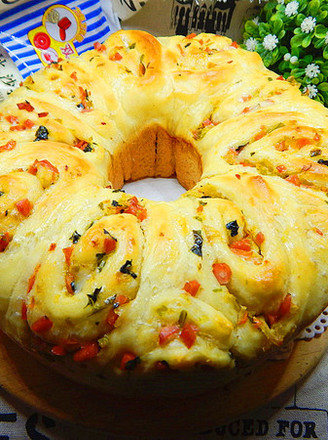
Milk Hydrangea Bread
1. Put all the main ingredients of the dough except the butter in the basin, (put the ingredients in the order, put the liquid first, then put the powder) knead the dough until the thick film is pulled out, then add the softened butter pieces, and continue to knead the dough. Knead the dough until the transparent film can be pulled out
2. Put the kneaded dough in a basin, cover with plastic wrap, and ferment to 2.5 times its size in a warm place. (The fermentation temperature is best to be around 38 degrees)
3. After the dough is fermented to about 2 times, dip your fingers in the powder and poke a small hole in the middle of the dough. It will ferment without shrinking or rebounding.
4. Exhaust the fermented dough, divide the dough into 18 equal parts, about 22 grams each, then round the dough, cover with plastic wrap and wake up for 10 minutes
5. Take two small doughs and knead them into round strips with a thickness of 7-8 mm.
6. Cross the two long strips
7. Cross the two below
8. Then cross the top two roots downwards
9. Repeat steps 8 and 9 to become a 4-strand braid shape
10. Turn the braid over again, brush a little water on the surface, and roll it up from the thin end
11. After rolling, pinch the joint tightly to form a hydrangea encapsulated embryo
12. Put the shaped hydrangea embryos in the baking tray lined with greased paper. I drag it with bread paper, and then place it in a warm place for secondary fermentation to double the size.
13. After the fermentation is complete, brush the surface with a thin layer of egg liquid, and preheat the oven to 170 degrees
14. Put it in the middle layer of the preheated oven, heat up to 170 degrees, and bake for about 15 minutes. If the surface color is satisfactory halfway, cover with tin foil
15. After the oven is out, take out the baked hydrangea bag and brush the surface with cooked vegetable oil or melted butter. Today’s hydrangea is not good-looking, please forgive me, but it tastes very good and soft
Tips: 1. The dough should be kneaded to the fully expanded stage (the transparent film can be pulled out) so that the baked bread will have a drawing effect
2. After the raw embryos are baked in the oven, the surface is colored and covered with tin foil to avoid uneven coloring and not easy to bake
3. Different oven brands have different temperature differences. Dear friends, adjust them according to the temperature of your own oven.
4. Brush oil on the surface after baking, so that the bread looks better and shiny.


 Buy on JD
 Buy on Amazon