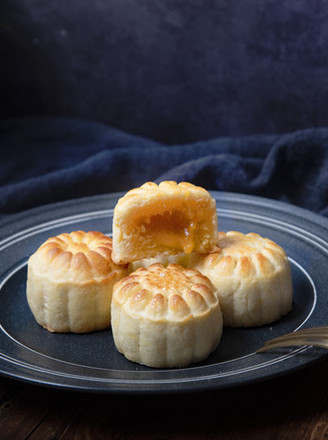
Sweet Pie with Cranberry Filling
by Q pig baby
Favorite
Difficulty
Normal
Time
1h
Serving
5
The Lunar New Year is just one week away. At the end of the year, there are various busy schedules, so everyone is working hard. It is time to sit down and take a good rest. Today is the last weekend before the new year. I made a cup of Da Hong Pao for everyone and prepared a cranberry sweet pie. Let’s have a cup of tea and a pie! I don’t know if you also like this kind of unrestrained feeling, flipping through a book of travel, walking around the world between the lines following the author’s description, "walking" tired, stopped, sipped tea, and tasted a snack , And then continue to read downstream. "If you don't travel far, you'll be old", I appreciate the author's action of leaving and leaving, don't let people leave regrets. The sun and the moon exchange, year after year...Looking back on the days of this year, how are you doing? ! Cranberry sandwich sweet pie, sweet and sour, sour and sweet, like our life, not singular and boring.
Mould: 6 consecutive cups of champagne gold non-stick muffin cake bread Baking mould Baking: middle level of the oven, upper and lower fire 175 degrees, 25 minutes
Mould: 6 consecutive cups of champagne gold non-stick muffin cake bread Baking mould Baking: middle level of the oven, upper and lower fire 175 degrees, 25 minutes