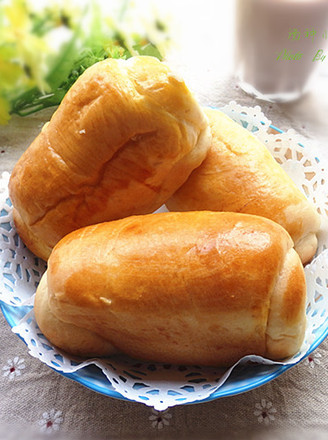
Caterpillar Bread
1. Except butter, put all the dough materials into the bread machine, put the liquid first, and finally put the flour, dig a hole in the flour to bury the yeast, start the bread machine and dough program, after kneading for 20 minutes, add the previously cut small pieces to soften the dough Butter, continue to knead to the complete stage
2. The kneaded dough is fermented in the bread machine barrel
3. Dough that is 2.5 times fermented
4. Dip your fingers with flour, the jack dough does not shrink, and the fermentation is complete
5. Take out the dough, squeeze and exhaust, divide it into six equal parts, round, cover with plastic wrap and proof at room temperature for 15 minutes.
6. Divide the red bean paste into six portions and weigh them, 30 grams each
7. Take a dough and flatten it
8. Put 30 grams of red bean paste weighed in
9. Pack it tightly and close it downward
10. Entire dough
11. Slowly roll it into an oval shape with gentle movements to prevent the bean paste from squeezing out
12. Use a sharp small blade (I don't have a serrated knife for the blade) to make even cuts on the dough, cut to the bottom edge, pay attention to only cut the upper layer, exposing the bean paste, do not cut the lower layer (I am afraid of beans) The hourglass comes out, the first roll is a bit thick)
13. Turn it over gently, with the cut side facing down, gently roll up from the side, and roll it over until it grows into a cylindrical shape with the cut just facing up. When rolling, it should be tight and not too tight.
14. After all the rolls are finished, put them in the baking tray in turn, and put them in the oven for fermentation. Put a bowl of hot water under the baking tray and ferment to 1.5 times the size.
15. Take out the egg-brushing liquid, put it into the middle layer of the preheated oven at 200 degrees, and bake for about 15 minutes at 180 degrees and 165 degrees. When the color is slightly satisfactory, cover with tin foil in time to prevent over-baking
Tips: 1. Each oven has a different temper, so you can control the temperature and time by yourself
2. The water absorption of different flours is different, please increase or decrease as appropriate
3. When the coloring is slightly satisfactory, cover with tin foil in time to prevent over-baking
4. Roll out the wrapped dough slowly as much as possible, so that it will look beautiful, I rolled it out a bit thicker


 Buy on JD
 Buy on Amazon