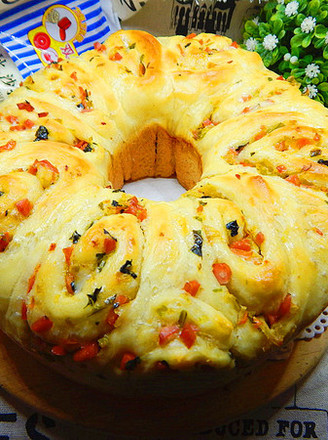
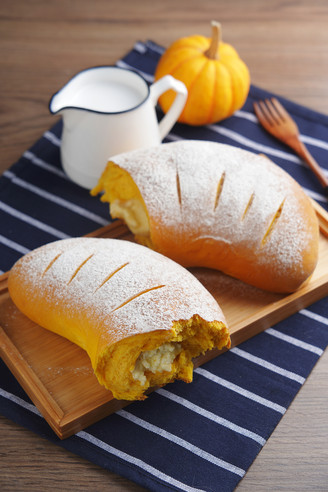
Coconut Flower Roll Bun
1.
Because the dough is kneaded directly with a bread machine, all the ingredients of the dough are poured into the bread bucket. Yeast is digging a small hole in the flour and burying it to avoid direct contact with sugar and salt. Then I started the automatic dough mixing program. I set it up for 30 minutes; after about four minutes, all the ingredients became clumps. But the surface is not too smooth
2.
After 17 minutes of kneading, the dough has a thin film, but it is not tough enough; this is after 26 minutes of kneading, there is already a large piece of glove film
3.
Then leave the dough in the bucket for basic fermentation; send it to twice the original size. I went out when the dough was raised, and I looked back and it was already a bit.
Make coconut filling while the dough is fermenting. After the butter has softened at room temperature, add sugar to beat, then add egg liquid to beat, then pour in coconut paste and mix well; finally pour in water or milk, mix well and let stand for a while, so that the coconut paste will absorb the moisture
4.
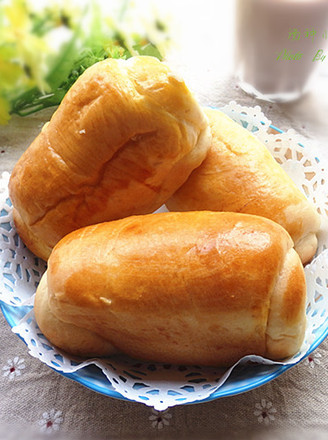
First take out the dough and press to expel the internal air, let it rest for ten minutes to relax; then take a dough, press it flat or roll it into a circle, you can sprinkle some flour on the chopping board to prevent sticking; take 1/8 of the coconut stuffing and wrap it in In the dough
5.
This is the state that the seal is facing down after the seal is sealed, and then put it on the chopping board and flatten it first, and then roll it into a beef tongue shape with a rolling pin. Be careful here, do not roll out the coconut fillings from both sides; then use that sharp utility knife to draw a few cuts on the dough diagonally; see the effect of the strokes up close. Do not draw too deep to see the bottom of the chopping board, nor too shallow to reveal the coconut filling
6.
Then turn the dough over, roll the two ends of a long strip and pinch them to be sharper, thinner, and then press the two ends together to avoid unraveling when it will ferment. This step will be a little troublesome. Practice makes perfect. Roll up the 8 flower rolls in turn and place them in a baking pan covered with greased paper.
7.
Then put the bread in a warm and humid place for secondary fermentation. I put a bowl of boiling water in the oven to make it. It takes 40 minutes; this is what it looks like, some bread may be unraveled, so tidy it up slightly; rinse a layer of egg liquid on the surface of the bread and put it in the middle of the preheated oven, and bake it at 180 degrees for about 15 minutes. Just turn the surface golden yellow. If you get a lot of heat, you can cover with a layer of tin foil after coloring to prevent heavy coloring
8.
Don't eat it immediately after it's out of the oven, there is still sour gas inside after fermentation that has not evaporated. After the bread cools, put it in a fresh-keeping bag and keep it tightly sealed.


Tips:
Two words: (knowledge points are here)
1. The flour I use is new and good, so the amount of water added is also based on its water absorption. If you use other flour, set aside 10-20 grams of water, and then decide whether to continue adding it after seeing the water absorption of the dough
2. The high-gluten flour + a small amount of low-gluten flour in the formula is used to adjust the gluten degree of the flour. It is also the practice of many Japanese-style Taiwanese soft breads. It needs a little softness and fluffy. That kind of square toast is rarely mixed with low-gluten flour
3. Because the tutorial is easy to make at home, considering that some friends are inconvenient to buy butter, so I replaced the butter with corn oil (or salad oil). Butter is lumpy, so it needs to be added after kneading. Corn oil can be added as soon as the ingredients are mixed.
4. Questions about the bread machine. My bread maker is ACA’s ingenious pink model. It is more powerful when kneading the dough to produce the film, but it also has the disadvantage that the color is darker during the final baking, and a layer of tin foil needs to be wrapped in the barrel for heat insulation.
5. For other baking tutorials with classification, please subscribe to my public account: xizhenyishen, not only has the most food tutorials, but also good-looking spiritual notes and handmade art tutorials.