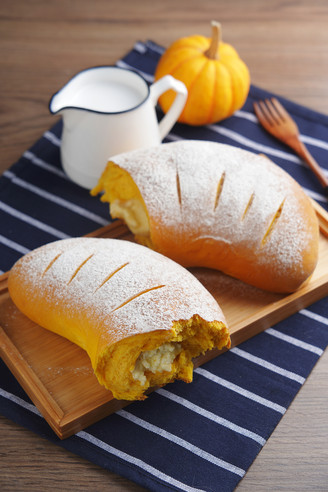
Crispy and Delicious Coconut Bread [coconut]
1.
Make coconut filling: butter and powdered sugar until it is fluffy and white
2.
Add eggs, milk powder, milk, and coconut in sequence, mix well and refrigerate for half an hour for later use
3.
Making soup: The soup is made by boiling flour and water in a ratio of 1:5. 84g soup type = 14 g high powder + 70g water. Because the amount of soup is small this time, it is easy to paste directly on the fire, so you can use the water-proof method to cook until the batter becomes transparent.
4.
Dough making: Put the ingredients except butter into the bread machine one by one, and start the kneading program for 20 minutes
5.
Add the butter and continue to choose the kneading process for 20 minutes
6.
After the dough is kneaded, the dough is put in the bucket of the bread machine for basic fermentation
7.
When the dough is fermented to 2.5 times larger, the basic fermentation is over
8.
Take out the fermented dough and vent, and divide them into 8 small doughs, and also divide the coconut stuffing into 8
9.
After the dough sits for 15 minutes, roll it out into a rectangular shape and thin it out on one side
10.
Spread the coconut filling evenly
11.
Roll up from one side, close the mouth and squeeze, both ends need to be squeezed
12.
Cut in half from the middle, try to cut evenly, ~ one end needs to be cut, the other is not used
13.
Cut the side up, try to expose the coconut paste filling, twist the two pieces together, and pinch the tail tightly
14.
Into the mold
15.
Place in a warm and humid place for secondary fermentation. The second fermentation is over; the surface is brushed with egg liquid, sprinkled with a little chopped almonds for decoration
16.
Preheat the oven at 180 degrees for 10 minutes, put the bread in the middle and lower layers, and bake for about 20-30 minutes (depending on the adjustment time of the own oven)
17.
Preheat the oven at 180 degrees for 10 minutes, put the bread in the middle and lower layers, and bake for about 20-30 minutes (depending on the adjustment time of the own oven)
18.
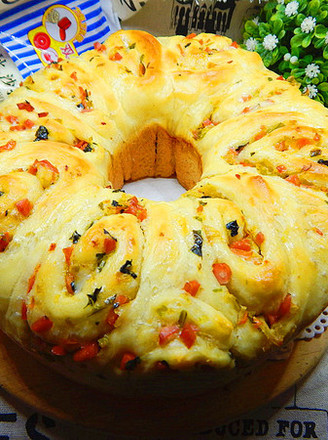
Finished product
19.
If you don’t have a submarine mold, you can make this love shape or twist it into a twist shape and put it directly on the baking tray. The same is true.

![Crispy and Delicious Coconut Bread [coconut] Crispy and Delicious Coconut Bread [coconut]](https://img.simplechinesefood.com/b9/b987153709c97a7db89d466f50ae0480.jpg)
![Crispy and Delicious Coconut Bread [coconut] recipe Crispy and Delicious Coconut Bread [coconut] recipe](https://img.simplechinesefood.com/03/0367f9433f83286b1c8b523a1d4a1ad5.jpg)
![Crispy and Delicious Coconut Bread [coconut] recipe Crispy and Delicious Coconut Bread [coconut] recipe](https://img.simplechinesefood.com/7f/7f5b9cf39b1d8ce860b5008d2bea7963.jpg)
![Crispy and Delicious Coconut Bread [coconut] recipe Crispy and Delicious Coconut Bread [coconut] recipe](https://img.simplechinesefood.com/60/609a5333615f1b87fd925a724f737dec.jpg)
![Crispy and Delicious Coconut Bread [coconut] recipe Crispy and Delicious Coconut Bread [coconut] recipe](https://img.simplechinesefood.com/91/914c76cb426fe60c77bc0995274e43aa.jpg)
![Crispy and Delicious Coconut Bread [coconut] recipe Crispy and Delicious Coconut Bread [coconut] recipe](https://img.simplechinesefood.com/8a/8aefe68bcd8ef244718655085216f722.jpg)
![Crispy and Delicious Coconut Bread [coconut] recipe Crispy and Delicious Coconut Bread [coconut] recipe](https://img.simplechinesefood.com/1a/1acd60226ca4fe9ebc925946b5c1d0c0.jpg)
![Crispy and Delicious Coconut Bread [coconut] recipe Crispy and Delicious Coconut Bread [coconut] recipe](https://img.simplechinesefood.com/c6/c65d2deec6e614d3724e3dffe24fe33b.jpg)
![Crispy and Delicious Coconut Bread [coconut] recipe Crispy and Delicious Coconut Bread [coconut] recipe](https://img.simplechinesefood.com/b1/b118f372e6469f5694a9a1fdf0f3c023.jpg)
![Crispy and Delicious Coconut Bread [coconut] recipe Crispy and Delicious Coconut Bread [coconut] recipe](https://img.simplechinesefood.com/f5/f5009340c49337dfd4c8c51c3125e3cb.jpg)
![Crispy and Delicious Coconut Bread [coconut] recipe Crispy and Delicious Coconut Bread [coconut] recipe](https://img.simplechinesefood.com/47/47ac31d77221a54a0b0795f160109991.jpg)
![Crispy and Delicious Coconut Bread [coconut] recipe Crispy and Delicious Coconut Bread [coconut] recipe](https://img.simplechinesefood.com/02/021202cc9d08998278affce2b491a086.jpg)
![Crispy and Delicious Coconut Bread [coconut] recipe Crispy and Delicious Coconut Bread [coconut] recipe](https://img.simplechinesefood.com/98/98a0ea72fc0050e1ffc499d096f43abc.jpg)
![Crispy and Delicious Coconut Bread [coconut] recipe Crispy and Delicious Coconut Bread [coconut] recipe](https://img.simplechinesefood.com/e3/e3543cb9904a7639ea6d83df0fd89f0c.jpg)
![Crispy and Delicious Coconut Bread [coconut] recipe Crispy and Delicious Coconut Bread [coconut] recipe](https://img.simplechinesefood.com/f7/f7699ad3072e164e0c3ef6e91c64431a.jpg)
![Crispy and Delicious Coconut Bread [coconut] recipe Crispy and Delicious Coconut Bread [coconut] recipe](https://img.simplechinesefood.com/1f/1f416f17d849ecc5d7170488284f877a.jpg)
![Crispy and Delicious Coconut Bread [coconut] recipe Crispy and Delicious Coconut Bread [coconut] recipe](https://img.simplechinesefood.com/dc/dcd33683a081bd56c9e944a816fc5c47.jpg)
![Crispy and Delicious Coconut Bread [coconut] recipe Crispy and Delicious Coconut Bread [coconut] recipe](https://img.simplechinesefood.com/ec/ecfec966057f9ecb98448bc56a38a33c.jpg)
![Crispy and Delicious Coconut Bread [coconut] recipe Crispy and Delicious Coconut Bread [coconut] recipe](https://img.simplechinesefood.com/1b/1b644da89d97917981744950cc443f60.jpg)
![Crispy and Delicious Coconut Bread [coconut] recipe Crispy and Delicious Coconut Bread [coconut] recipe](https://img.simplechinesefood.com/8c/8ce18bb66fadb1cc821d6e971f538b48.jpg)
