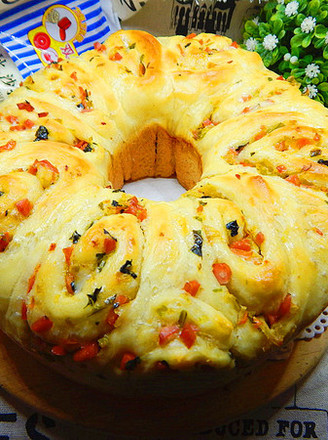
【crispy Hydrangea Bag】
by quenny
Favorite
2
Difficulty
Normal
Time
2h
Serving
2
This plastic surgery is still the styling I learned a long time ago, because I didn't do much later because of the trouble. However, this shape has a nice name called Hydrangea Bag. It should be because the finished shape itself is round and round like a hydrangea~
At the beginning, it may be a little confusing to see how this shape is edited, but in fact, as long as you follow the steps step by step, you will quickly become proficient, and after doing so one or two, you will be able to edit at will. Yes~ However, because the number of small hydrangeas to be made in this amount is relatively large, it is very necessary to move faster~
material:
Main dough: 180g high-gluten flour, 50g fine sugar, 3g yeast, 3g salt, 30g water, 47g egg liquid, 30g butter
Liquid: 100g high-gluten flour, 100g water, 1g yeast
Surface decoration: appropriate amount of egg liquid, appropriate amount of crispy grains, 8g of wine-stained cranberry
Crisp: 15g powdered sugar, 25g low-gluten flour, 12g milk powder, 20g butter"