Gingerbread House
1.
Pour all the ingredients for making gingerbread into a bowl, mix and knead by hand to form a dough
2.
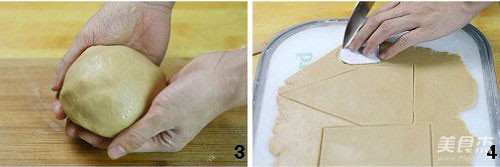
When you first knead the dough into a ball, the surface of the dough will be rough. Continue to knead patiently for a while until the surface of the dough is smooth. Put the kneaded dough in the refrigerator and relax for 1 hour. The loose dough is placed on the cutting board. Roll the dough into a thin sheet with a thickness of about 0.3cm (if the chopping board is not big enough, you can divide the dough into several small portions and roll them in batches). Put the cut paper model on the dough and use a knife to cut the pattern on the edge of the model

3.
Put the cut noodles on the baking tray (try not to deform), pierce some holes with a fork (or not), brush a layer of egg water, let it rest and relax for about 20 minutes, and then brush a layer of egg water, Put it in the preheated oven, and heat the middle layer up and down at 180 degrees, about 12-18 minutes (depending on the size of the biscuits), bake it to the degree of coloring you like, you can take it out, one plate is definitely not finished, so don’t I'm in a hurry. Let's take the test one by one. We must bake all the "parts" and don't miss it. Finally, you need to bake a large dough piece as the base


4.
After the biscuits are baked and cooled, the gingerbread house can be assembled. Make the meringue frosting first: mix egg whites and powdered sugar and stir, add lemon juice, and continue to whisk to become meringue frosting. (This step is very simple, you don't have to use an electric whisk, just use a manual whisk). The thickness of the prepared icing can be adjusted freely according to needs. For example, for my gingerbread house, the frosting used to glue the house should be thicker, so you can add a little less lemon juice or more powdered sugar. The icing on the roof should be thinner, you can add a little more lemon juice
5.
Start to "build a house" on the base. First assemble the bottom, use frosting to glue the corresponding cookies as shown in the picture, and then cover the small house on the side
6.
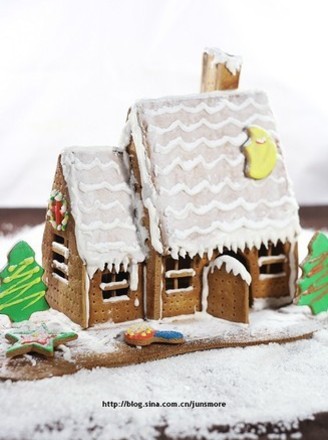
After the icing is dry, start to build the roof. At this time, the house is in its embryonic form. Finally, adjust some thinner icing and use a brush to dip the icing on the roof. Then decorate the house according to your own preferences, and sprinkle some powdered sugar on the whole house, and the dream house is completed. (The Christmas tree and small mushrooms next to the house are gingerbread cookies made from the same dough. Please click here for details)


Tips:
1. The gingerbread dough needs to relax for a while before rolling, otherwise it will easily shrink when it is rolled out and carved with a mold. Similarly, it is best to relax for a while before baking, otherwise it may be easily deformed;
2. If the shape and size of a plate of biscuits are different, the smaller biscuits will be baked first. Once the small biscuits are almost baked, take out the baking tray, take out the baked biscuits first, and then put the remaining biscuits back into the oven to continue baking;
3. The surface of the biscuits can also not be brushed with egg liquid. The difference is that if the egg liquid is brushed, the surface of the biscuit will have a layer of gloss;
4. Be patient when assembling the house. Especially for the roof, you must wait for the frosting to dry before letting go to prevent the roof from falling down without sticking;
5. Brown sugar powder is rarely available. In fact, you can buy brown sugar in the supermarket and use the grinding cup of a food processor to make powder when you get home. Ginger powder and cinnamon powder are available in supermarkets, and the amount can be increased or decreased according to your taste. In traditional gingerbread, some spices such as nutmeg powder and clove powder are added to the ingredients, but not everyone can get used to their taste, and you can decide whether to add it according to your own taste;
6. After the biscuits are carved with a mold, the remaining dough can be kneaded into a ball again, roll out (it is best to let it rest for 20 minutes), and continue to carve.




![Seasonal Vegetable Patties [baby Food Supplement] recipe](https://img.simplechinesefood.com/02/024b910033009872aea33017c755a377.jpg)


