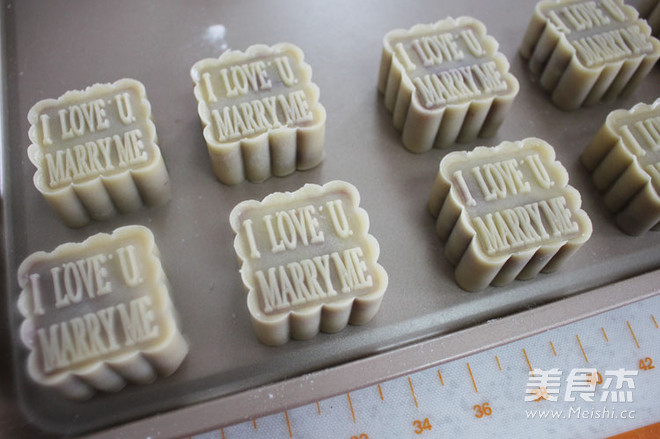
I Love You-taro Mooncake
1.
Weigh the inverted syrup and pour the liquid
2.
Use a manual whisk to mix in one direction slightly, and then add vegetable oil in portions. Salad oil at home is also okay, as long as you don’t choose a strong smell, such as olive oil, etc., it’s not acceptable.
3.
After mixing well, you must mix well during the mixing process. After mixing well, it will become thicker. Some pro-reflect that the cake crust is very sticky during the process of making mooncakes. A large part of the reason is that the syrup and oil are not mixed. Evenly, resulting in the separation of sugar and oil. After being thoroughly mixed, it will not stick during the packaging process.
4.
Sift the flour and mix well, then pour it on the silicone mat, open the nest, and prepare the scraper
5.
Pour the mixed sugar and oil mixture
6.
Use a spatula to mix well, and after mixing well, wrap it in plastic wrap and let it relax for 1 hour
7.
Because the mold is 63 grams per serving, according to the ratio of 3:7 grams, weigh 44 grams per serving
8.
Cake crust 18g/serving
9.
Take a portion of the skin and wrap the stuffing
10.
Slowly push up with the mouth of the tiger until the mouth is closed. When wrapping, pay attention to the thickness of the cake.
11.
After packing, stick some anti-sticking hand powder to avoid bad peeling
12.
Slightly squeeze the mooncake ball to lengthen it so that it won’t be scraped off when it’s placed in the square mold
13.
Prepare the colored egg liquid on the surface. The ratio Xiaopang uses three egg yolks + one whole egg. Because you want the surface color of the mooncakes to look better, you can add a little invert syrup and mix well.
14.
Pay attention when removing the film. It is best to fix the position. Press the film where you want the mooncake to be, because after the film is removed, there is no way to move it. If it is forced to move, it is easy to give the mooncake It's deformed, so be sure to determine the position before removing the film


15.
Heat up to 160°C, lower to 200°C, put in the oven for 8 minutes, first bake the surface of the mooncake until the color is white, and then take it out.
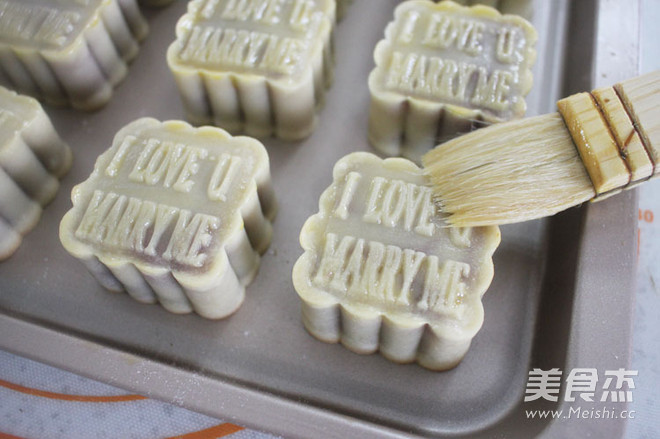
Use a wool brush to color the egg liquid. The wool brush is more delicate and the brushing effect will be better than the silicone brush. When brushing, pay attention not to stick too much egg liquid at a time. After the wool brush sticks the egg liquid, it should be on the side of the bowl. Just a little bit each time. If you stick too much egg liquid at a time, the egg liquid will get stuck in the pattern during the brushing process, and the surface pattern will be unclear. The egg liquid has to be brushed three times each time. After the last time it was dry, brush it again until the third time. After brushing the egg mixture, put it in the oven and bake for about 15 minutes. After brushing the egg mixture, put it in the oven and bake for about 15 minutes.


Tips:
1. Pay attention when mixing sugar and oil, be sure to mix well, otherwise it will cause the skin to be too sticky.
2. When removing the film, you must first determine the position on the baking tray, and then press the film directly on the position to prevent it from moving after the film is removed, which will easily cause the moon cake to deform.
3. If you want to make homemade fillings, the water content of the fillings should not be too dry. If the water content is too large, it is easy to cause lower waist and cracking during the baking process.
4. When coloring the egg liquid, be sure not to brush too much egg liquid, lest the egg gets stuck in the pattern and the pattern is not clear. When the wool brush sticks to the egg liquid, be sure to place it on the side of the bowl, each time there is only a little egg liquid, and repeat the brush three times, each time after the previous time is completely dry.