Mini Chocolate Tart

Mini Chocolate Tart

by Jun Bak

4.8 (1)
Favorite

Difficulty

Normal

Time

1h

Serving

2

Want dessert, but afraid of getting fat? Have a super perfect mini chocolate tart. When it's cold, I crave desserts, especially the super rich chocolate desserts. Every cell in the body seems to be calling: calories, calories, I need calories!

But this is by no means a solution. If I want to relieve my gluttony and fear of getting fat, I have a coup, that is-make all the desserts into super small portions.

For example, today this fragrant chocolate tart is very small and looks very cute. At the same time, the calories of a small one are also acceptable. When you're greedy, it's good to eat such a small piece, pair it with a cup of sugar-free hot tea or coffee, and savor it slowly, which is comfortable and reduces a lot of psychological burden.

I have always felt that desserts, which are very pleasant things, would be a shame if you stay far away because you are afraid of getting fat. Eating sparingly is the ideal way to enjoy desserts.

But you have to say: Your method is good, but I am afraid I will not be able to take one after I eat one, and I will eat all the rest in one breath. What should I do?

…I don’t have any good options for this. In fact, it’s good to be fatter, right? "
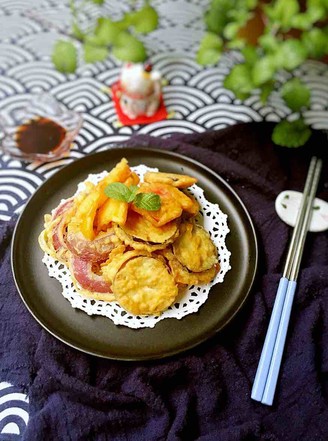
Ingredients

Mini Chocolate Tart

1. First make the tart crust. After cutting the butter into small pieces and softening it, add powdered sugar and salt. Whisk with a whisk. ★After adding the powdered sugar, do not start the whisk, and directly use the whisk to manually stir a few times to fully mix the powdered sugar and butter, then turn on the whisk. This way the powdered sugar will not spill out.

Mini Chocolate Tart recipe

2. Add the whole egg liquid in 2 times and continue to beat with a whisk.

Mini Chocolate Tart recipe

3. Whip until the butter has a fluffy and delicate texture as shown in the picture.

Mini Chocolate Tart recipe

4. Mix low-gluten flour and cocoa powder evenly, then sift into the whipped butter.

Mini Chocolate Tart recipe

5. Mix thoroughly with a spatula to form a moist dough. Cover the finished dough with plastic wrap and put it in the refrigerator for 1 hour.

Mini Chocolate Tart recipe

6. After refrigerating the dough, take a small half, squeeze it on oil paper and roll it out into a thin dough sheet. Then use a circular cutting die with a diameter of 6.5 cm to cut round dough pieces. ★The dough is relatively large. In order to avoid the rolled dough sheet being too large, it is divided into 2-3 portions to roll out. ★The cut off pieces can be re-kneaded together and rolled out again (just gently knead together, avoid excessive kneading). ★If the dough is too soft, you can put it in the refrigerator for a while to make it hard before picking it up. ★If there is no circular cutting die, you can replace it with a similar tool at your hand, such as a circular cup lid.

Mini Chocolate Tart recipe

7. Spread the round dough in a small cake mold and knead it gently with your fingers to make it fit the shape of the mold. If there is air at the bottom that is not tight, you can use a toothpick to pierce the dough to let the air out. Roll out all the dough and cut it, and you can make about 20 pieces in total (I used a 12-piece cake mold, so I divided it into two pieces). ★The size of the cake mold: the diameter of the upper mouth is 4.5cm, and the diameter of the lower mouth is 3.5cm. If you want to make a larger tart, you can also make about 4 4-inch tarts, or 2 6-inch tarts. However, the proportion of tart filling may need to be adjusted (for example, if the tart filling is not enough, you can make more according to the proportion), and the baking temperature needs to be extended accordingly.

Mini Chocolate Tart recipe

8. Use a 4.5cm diameter circular cutting die to cut off the excess tart skin.

Mini Chocolate Tart recipe

9. Then use a small fork to carefully remove the excess tart crust.

Mini Chocolate Tart recipe

10. Finally, use a small fork to make some small holes in the bottom of the tart to prevent the bottom of the tart from bulging during baking. After the treatment is completed, let it stand for 20 minutes before baking.

Mini Chocolate Tart recipe

11. While the tart crust is standing still, the tart filling can be prepared. Pour the dark chocolate, milk, and sugar into a large bowl, heat it over water (or in a microwave oven), and stir gently until the dark chocolate is completely melted and becomes a chocolate liquid. ★Dark chocolate with a total cocoa content of 55% is best. I used button-shaped dark chocolate. If you are using lumps, you need to chop them first.

Mini Chocolate Tart recipe

12. Pour the whole egg liquid into the chocolate liquid.

Mini Chocolate Tart recipe

13. Stir thoroughly with the homogenizing stick of the king-baking whisk, and the tart filling is ready. ★Use a homogenizing rod to stir to avoid excessive bubbles in the tart filling. If you don't have one, use a spatula to mix it gently and thoroughly, remember not to stir quickly, otherwise a large number of bubbles will cause the surface of the tart filling to be uneven after baking.

Mini Chocolate Tart recipe

14. Preheat the oven to 190℃, put the mold in the middle of the oven, bake for about 12 minutes, until the shape is set and the edges are slightly colored and then taken out.

Mini Chocolate Tart recipe

15. Pour the tart filling into the tart crust. 9 points full.

Mini Chocolate Tart recipe

16. Put it back in the middle of the oven, lower the temperature of the oven to 160℃, and continue to bake for about 15 minutes. Shake the baking tray, when the tart filling has completely solidified and no longer has a sense of flow, it can be baked.

Mini Chocolate Tart recipe

17. Finished product.

Mini Chocolate Tart recipe

Tips:

1. The chocolate tart can be eaten after cooling. The tart skin is crispy and the tart filling is creamy and rich. It is especially suitable with unsweetened black coffee (if you like) or black tea.
2. The chocolate tart can be sealed and refrigerated for about 5 days, but the tart skin will become soft. If you don’t like the soft tart crust, you can put it in the oven and rebake for a few minutes. After cooling, the tart crust will become crispy again.

Comments

Similar recipes

Sausage and Vegetable Scones

Low-gluten Flour, Corn, Butter

Soup Type Soft Bread

Milk Powder, Low-gluten Flour, Salt

Seasonal Vegetable Patties [baby Food Supplement]

Minced Meat, Low-gluten Flour, Shiitake Mushrooms

Seasonal Vegetable Tempura

Onion, Eggplant, Dried Shiitake Mushrooms

Tyrannosaurus Spinach Bread

Low-gluten Flour, Egg, High-gluten Flour

Vegan Banana Cakes

Low-gluten Flour, Whole Wheat Flour, Coffee Powder

Pumpkin Cranberry Bread

Pumpkin Puree, Low-gluten Flour, Egg