Oreo Cocoa Layer Cake

Oreo Cocoa Layer Cake

by Zero Zero Baking

4.8 (1)
Favorite

Difficulty

Easy

Time

15m

Serving

2

Because of the sweet pit of baking that I love, I’m crazy about baking like everyone else. In addition to the lack of time, I want to make all kinds of cakes and biscuits, from morning to night, especially for my appearance party. The beauty of it is definitely not to be missed, coupled with the deliciousness, it is perfect.
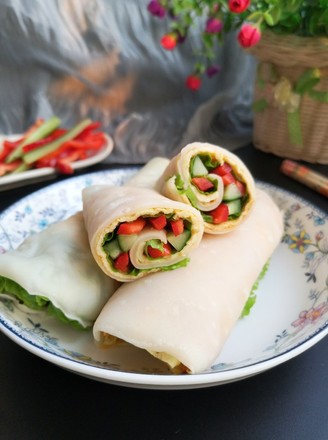
Thousand-layer cakes have become popular in China in recent years, and they are also very simple to make. Newbies are recommended to try.

If you can't do chiffon well or decorate cakes well, then make a thousand layers, and you can definitely make it.
If it is said that there is a difficulty in omelet cake, it should be on the skin. The omelet is actually made the same as omelet, so if you can make omelet, this is really SO Easy!

And you can also make pancakes by the way to make a thousand layer cake. With the skin, just add the creamy fruit! The skin must be thinner to make it delicious.

Ingredients

Oreo Cocoa Layer Cake

1. First prepare the ingredients for the melaleuca, put the flour and cocoa powder in the sieve, put a layer of oil paper underneath, and melt the butter in heat insulation and water for use.

Oreo Cocoa Layer Cake recipe

2. Beat the eggs into the basin, add 25 grams of fine sugar, and beat with a manual whisk until the sugar melts

Oreo Cocoa Layer Cake recipe

3. Add milk and melted butter, beat until the oil and water are mixed

Oreo Cocoa Layer Cake recipe

4. Add the powder that has been sifted twice. Sifting twice is to mix the cocoa powder and flour more evenly, and also to reduce the particles when mixing. Sift it once on greased paper, and then sift it directly into the basin.

Oreo Cocoa Layer Cake recipe

5. Sift the powder and mix well, the consistency is shown in the figure

Oreo Cocoa Layer Cake recipe

6. The batter is sieved to remove some small particles and bubbles to make the skin smoother (the sieve of a soymilk machine is generally useful)

Oreo Cocoa Layer Cake recipe

7. Heat the pan on medium and small fire, brush a thin layer of butter on the pan with a brush, then turn to low heat, then scoop a spoonful of batter into the middle of the pan, pick up the pan with your left hand to spread the batter into a cake shape, use a non-stick pan for more Good operation. (Especially for novices, be sure to control a small fire, if you want to be thinner, use a small fire)

Oreo Cocoa Layer Cake recipe

8. Fry until the color of the dough changes from light to dark, and the surface is delicate and shiny. The dough can be out of the pan when the dough is slightly tilted. When it is out of the pan, lift the surface by hand, and then gently scoop it with a spatula. It is too thin and easy to break. When frying, you can’t fry too much. If you fry it too much, it will break and lose its elasticity. After the crust is fried, put it on the plate and set aside. (The crust for the cake can also be fried on both sides. When one side is fried, turn it over and cook for a few seconds, depending on personal preference. If you are making pancake pancake, you only need to cook one side)

Oreo Cocoa Layer Cake recipe

9. Oreo cookies scrape off the middle filling

Oreo Cocoa Layer Cake recipe

10. Put the scraped biscuits into a bag and use a rolling pin to roll them into pieces for later use. The bag for the biscuits should be thicker, and thicker piping bags are also acceptable. I use a ziplock bag here.

Oreo Cocoa Layer Cake recipe

11. Use a round mold to press out round doughs of uniform size for later use. (I have fried dough on both sides, so the surface is not so smooth. This round mold is about 5 inches in size)

Oreo Cocoa Layer Cake recipe

12. 300g whipped cream and 30g fine sugar are beaten until the pattern is obvious as shown in the figure.

Oreo Cocoa Layer Cake recipe

13. Spread a piece of dough on the piping turntable, then spread a layer of cream, and then sprinkle with crushed Oreo cookies, and finish the dough in this order. Sprinkle as much of the biscuits as you like, but don’t sprinkle them too full, otherwise the next crust will not stick firmly, and the place where the cream is left will play a role in bonding.

Oreo Cocoa Layer Cake recipe

14. After the top layer of cream is smoothed, use a spatula to wipe off the excess cream around it, and just smooth it slightly. What you want is that you can see the feeling of black and white. Of course, if you like this kind of naked cake feel, you can also not wipe it. Yes, so this kind of cake does not require decorating technology.

Oreo Cocoa Layer Cake recipe

15. Add some cream to the piping bag with the piping mouth

Oreo Cocoa Layer Cake recipe

16. Squeeze a flower out of the top of the cake, then insert an Oreo cookie to finish

Oreo Cocoa Layer Cake recipe

Tips:

1. Mine is a 5-inch quantity. It is recommended to double the quantity for the dough that is not easy to grasp, otherwise it may not be enough.
2. When making the skin, you can control the thickness according to your preference, and you can control the heat well.
3. It is also delicious if you chop the excess dough into a bowl and mix with cream.

Comments

Similar recipes

Braised Eggplant

Eggplant, Salt, Flour

Pimple Soup

Ginger, Parsley, Chives

Seasonal Vegetable Pie

Flour, Shimizu, Cucumber

Pimple Soup

Flour, Tomato, Water

Seasonal Vegetable Quiche

Green Bean Sprouts, Carrot, Shiitake Mushrooms

Seasonal Vegetable Soup Baba

Flour, Tomato, Sausage

Cornmeal Fried Dumplings

Glutinous Rice Balls, Flour, Cornmeal

Pimple Soup

Tomato, Flour, Rape