Pangdomi Toast (wang Chuanren: Natural and Additive-free Handmade Bread)
1.
Put all the ingredients except unsalted butter in the bread bucket (be careful not to let the salt come into contact with the yeast, because the salt will inhibit the fermentation of the yeast), stir with chopsticks to a dry powder-free state, start the "kneading" program, and make the dough face-to-face. Pause the bread machine during the dough and knead the dough. If the dough is very soft (softer than the dough for making steamed buns) and there is very little batter on your hands, it means that the humidity of the dough is appropriate.
2.
After a "kneading" process is over, put the dough in a plastic wrap and put it in the refrigerator for 20 minutes (because the machine will heat up during operation, so in order to prevent the dough from starting to ferment prematurely, put it in the refrigerator. At the same time, the refrigeration will also change the mixture. Destroy the original structure of the dough tissue, making it easier to get out of the glove film)
3.
Take it out after 20 minutes, add butter, and start the "kneading" program again (I didn't take pictures of the following steps of throwing the dough. I really don’t want to take pictures with my mobile phone because of the oily hands. Fortunately, I took the picture the last time I made black tea toast. Photo, I will use it this time)
4.
Prepare 10 grams of olive oil and a brush, take out the dough, hold one end of the dough with one hand, and drop the other end of the dough onto the table with the other hand. Pick up the dough that has been dropped from the table and drop it again. Repeat the action 6 ~10 times, the dough will be beaten longer and longer. If the dough breaks as soon as it falls, or it gets drier as it falls, it means that the dough is not wet enough. Add water or milk, paying attention to it. Brush a layer of olive oil on the surface of the rolled dough
5.
Fold the dough in half, grab it and continue throwing it as you just did, throw it 6-10 times, brush the oil again, fold it again, fold it again, fold it again, fold it again, and throw it again... and so on.
6.
When you feel that the surface in your hand becomes softer and softer, it will not break if you fall a dozen times and it will be very long and thin. The dough will have a special soft and elastic feeling when you hold it, which is almost like a glove film. At this time, it is necessary to check the state of the dough at any time, so as not to break the gluten due to excessive beating, and all previous efforts will be lost.
7.
Put some oil on your hands, take a small piece of dough and slowly stretch it into thinner dough. The more you lift it, the thinner the dough becomes, and it becomes more and more transparent. If you beat the glove film for half an hour and don’t pull it out again, don’t continue to fall, because it’s probably not that the dough is not strong enough, but that your technique of holding the glove film is not good enough; follow the steps below, the latter fermentation will be in place, and the bread will be soft There is absolutely no problem with drawing
8.
Round the dough and put it back in the bread bucket
9.
Cover with a piece of baking paper, and flick some drops of water on it with your hands
10.
Cover a damp towel and cover the lid of the bread machine to allow the dough to rise naturally. This is the first fermentation. The fermentation is controlled within two hours to double the size. The secret of soft and silky bread is-slow fermentation! The texture of the bread from slow fermentation is more stable and mature, and the holes are smaller and the taste is softer. So when I make bread, as long as the weather is not particularly cold, and the dough cannot rise without the help of the fermentation function of the bread machine or oven to heat up, the first time I leave it, I let the dough rise naturally. And I don’t use the cling film to ferment, because the cling film is not breathable.


11.
When the dough has doubled in size, dip your fingers in water and poke a hole in the dough. Take out your fingers. The hole remains unchanged, which means that the fermentation is suitable. If the pressed hole quickly pops up, it means that the fermentation is insufficient; if there is obvious sinking around the hole or If it sinks quickly, it means that the fermentation is over-fermented.
12.
Take out the fermented dough, press the air out on the countertop, divide into three equal parts, round up, cover with plastic wrap and relax for 15 minutes
13.
Make the dough into an oval-shaped thin dough. You need to be thinner to completely exhaust the air. When rolling, you will hear the sound of bursting bubbles in the dough. If there are small bubbles on the edge, you can use a toothpick to break it. It is to exhaust the air completely.
14.
Flip the oval-shaped pastry and fold it in three from top to bottom
15.
Treat the three small doughs in this way, and then cover them with plastic wrap and relax for 15 minutes
16.
Open the bar again
17.
After turning it over, thin the bottom edge and roll it from top to bottom, paying attention to the bottom edge to be tight. Generally 2.5 turns is more suitable. If you feel that the surface of the roll is not smooth enough, you can repeat the previous exhaust rolling step to make the roll tighter, smoother and more beautiful.
18.
Roll up all three doughs and place them side by side in the toast box. I multiplied all the ingredients by 2 and made two toasts. At this time, the dough basically returned to the size before fermentation. The structure of the toast baked from the completely exhausted dough will be denser and more delicate. After placing it, put on plastic wrap for the second fermentation
19.
The second fermentation can be put into the oven, turn on the "fermentation" function, and keep the fermentation at a temperature of about 30-35 degrees. When the mold is seven or eighth full, you can put it in the preheated oven for baking. It can be seen that the surface of the fermented dough is smooth and flat, and there are no bubbles. This is the complete exhaust after the first shot. Effect.


20.
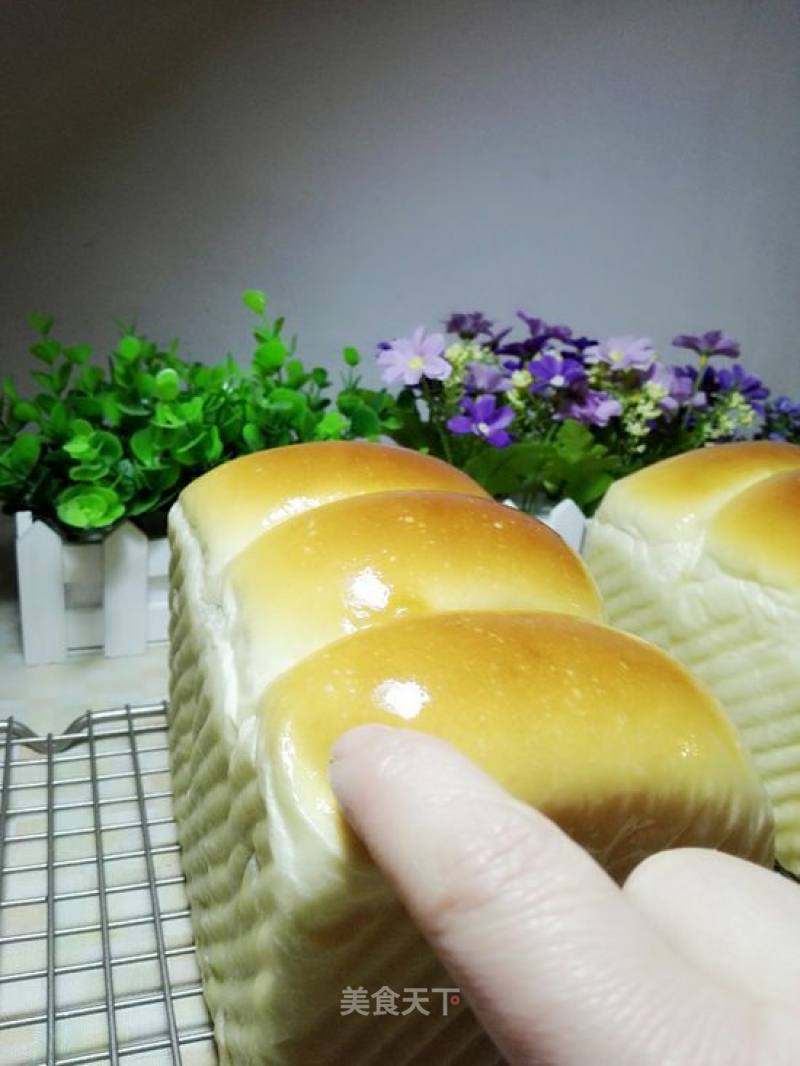
Put it in an oven preheated at 170°C and 190°C, and bake for 30 minutes at 165°C and 180°C (the thermometer in the oven shows 200°C). After entering the oven, pay attention to observation, and cover with a piece of tin foil to prevent the color from being too dark. After baking, take the bread out of the oven, pour the bread out of the mold, and brush a layer of melted butter on the surface of the bread while it is hot. Place it on a wire rack and let it cool to the palm of your hand, put it in a fresh-keeping bag, tighten the mouth of the bag, and enjoy it after it has completely cooled down.


Tips:
1 I usually make bread with eggs in the recipe. I will leave a little egg liquid to brush on the surface of the bread before it is fermented and put into the oven, so that the skin of the baked bread will be beautiful. Because there is no egg in the recipe of this Pondomi Toast, nothing is brushed on the surface before baking. Instead, a layer of melted butter is brushed on the surface after baking. The effect is also good.
2 The volume of bread with insufficient dough cannot increase, and the texture will be rough. The dough that is over-fermented is difficult to shape and has a sour taste, wine taste, and poor quality. However, if the fermentation is insufficient, the fermentation can be continued. If the fermentation is too high, it cannot be remedied, so be careful not to overgrow the dough

