Sponge Cup Decorated Cake
1.
The cake ingredients are ready, put the oil and water into a bowl
2.
Two eggs into the egg beater, add 50 grams of sugar
3.
Use an electric whisk to beat the eggs at medium speed. Lift the beater, the beaten egg batter can be patterned and disappear in 10 seconds, and the eggs are beaten well
4.
Sift the chiffon cake flour into the egg batter twice. After mixing with the egg batter for the first time, sift in the other half of the cake flour
5.
Mix well; start to preheat the oven at this time, 150 degrees
6.
Mix oil and water, then shovel a small amount of batter into the mixture
7.
well mixed
8.
Pour the mixed batter back into the big pot of batter
9.
Stir thoroughly and mix evenly, this is cake batter
10.
Pour the cake batter into the cake mold, 80% full
11.
Put it into the middle layer of the preheated oven, heat up and down at 150 degrees, 20 minutes
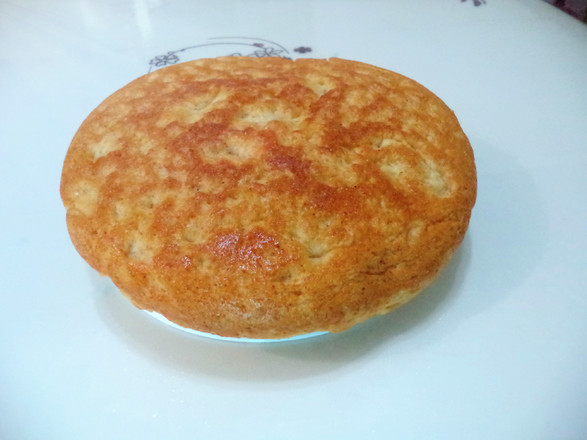
12.
Out of the oven, let it cool naturally on the drying rack
13.
Decorating materials are ready: light cream, honey frosting, decorating mouth, decorating bag, decorating mouth converter, food color paste, electric egg beater, rubber spatula, a cup
14.
Whipped cream and icing in the same bowl
15.
Use an electric whisk to whip the cream at low speed to make obvious lines and not flow easily. Do not beat too dry or too fast, otherwise too much air will enter the cream, the cream will appear too rough, and it will also be easy to beat the head. , It’s in the state of tofu residue, it can’t be used
16.
Mount the piping nozzle and converter on the piping bag
17.
Put the piping bag on the cup, use a rubber spatula to take an appropriate amount of cream into the bag
18.
Use a spatula to concentrate the cream from the top of the piping bag down to the bottom of the bag, so that it is not wasted, and the operation is refreshing and refreshing
19.
The round flower mouth used can be used at will, and there is no fixed pattern. With the same flower mouth, different patterns can be made by different methods.
20.
Divide the cream in the basin into two parts, drop a little yellow edible color paste on one part, and stir slightly with a spatula to form the color
21.
Replace the flower mouth with your favorite flower type, put the yellow cream in the bag, and squeeze your favorite pattern on the cup
22.
Add a little red edible cream to the remaining cream, so that it will become orange-red cream when combined with the remaining yellow cream and white cream.
23.
You can change to another flower mouth, squeeze out the pattern on the cup, and then embellish it with sugar beads and sugar granules.
24.
On the plate, it looks good
25.
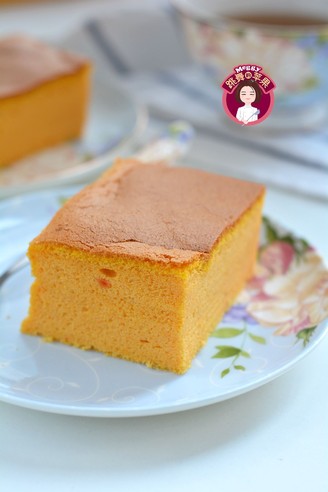
Appreciation of finished products
26.
Appreciation of finished products
27.
Appreciation of finished products
28.
Appreciation of finished products
29.
Don't look at it! Eat!


Tips:
1. The cup can be made with your favorite recipe, chiffon, sponge cake can also be used, don't worry about the cream decoration will crush the cake;
2. The whipped cream should be kept in the refrigerator for more than 10 hours before use. It should be sent at a low speed to avoid high speed. In the past, the cream was beaten too coarsely or was beaten into tofu. The whipped cream is delicate and shiny, and it does not flow easily. The cream that has been beaten can no longer be used for decorating flowers, but don’t waste it. It can be used to make bread or steamed buns. It tastes superb. In addition, the light cream used for decorating flowers is not recommended to use Nestlé, because Nestlé’s is soft. It won’t stand up, but it can be used to make egg tarts and ice cream. It is recommended to use President, Iron Tower, Anjia, and Blue Windmill to form the flowers. If you can’t use a large package of whipped cream at one time, you can squeeze out the air inside, wipe it with alcohol at the opening, and then use a sealing clip to put it in the refrigerator for storage. Note that it is not frozen, it is refrigerated! Within ten days Best eaten;
3. The flower mouth can be chosen at will, and the flowers and shapes can also be freely chosen. Even a simple 6-petal or 8-petal flower mouth can squeeze out an ice cream-like shape, so the flower shape and flower mouth do not need to be too deliberate. If you want more complicated patterns, you can search for videos on the Internet to learn;
4. If the bag is sturdy and you want to use the same color of cream, but you just want to change the flower mouth to change the pattern, then it is recommended to use the matching flower mouth converter. The flower mouth converter is divided into two parts. One part is placed inside. After the flower mouth is installed on the outside, the screw is buckled on the outside. When changing, the flower mouth can be easily changed by just unscrewing the screw. In addition, it should be noted that the flower nozzle converter is also divided into small and small models, which must be matched with the flower nozzle used!
5. It is recommended not to beat the cream too much at one time, especially when it is hot. If you don’t use a lot of cream when decorating the flowers, you can cover them with plastic wrap, store them in the refrigerator, and then take them out when you use them. In addition, when the weather is hot, you can decorate the flowers with cream. It is recommended to use the air conditioner. Carry out in a cold environment, and you can also wear winter woolen gloves, which can reduce the temperature of the hands and melt the cream;
6. If the cream needs to be toned, it is recommended to think about the colors to be used in advance, and make an orderly combination of colors, starting with light and then dark, so that the extra colored cream can be combined with the new pigments to become a new one. Acceptable colors; use high-quality big brands for pigments or color pastes, so as to avoid minimizing the risk, or simply use colorful fruits or candies instead of pigments;
7. The finished cream cake with flowers can be eaten within a few hours. If you can’t finish it, cover it in an airtight tin or a bag and store it in the refrigerator.