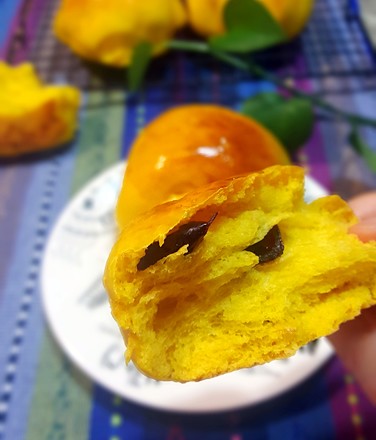
Walnut Pie
1. First make the pie crust. After mixing low-gluten flour and cocoa powder and sifting, mix them with caster sugar in a large bowl; cut the butter into small pieces (without softening), and mix with the sifted flour
2. Grab hard with your hands. Rub. Mix the butter and flour thoroughly; mix the butter flour thoroughly, showing the state of coarse corn flour; pour water in; knead it into a smooth dough. Wrap the dough in plastic wrap and put it in the refrigerator freezer for 1 hour
3. Spread a thin layer of flour on the chopping board to prevent sticking, put the refrigerated pie crust dough on the chopping board and roll it out until it is big enough
4. Spread the rolled dough on the pie pan and gently press it with your hands to make the pie crust fit the pie pan; roll the rolling pin over the pie pan and cut off the excess pie crust. Remove the excess pie crust; pierce some small holes in the bottom of the pie crust with a fork
5. Spread a piece of greased paper or tin foil, and put some heavy objects such as beans or small stones on the greased paper and tin foil. Then put the pie pan on the grill or baking tray, and put it into the second-to-last layer of the preheated 180℃ oven (the purpose of laying tin foil and putting heavy objects on it is to prevent the pie crust from bulging when it is roasting); bake for 15 minutes Afterwards, take out the pie tray and remove the tin foil along with the heavy objects in the tin foil. Put the pie pan in the oven again, bake for 5 minutes, and set aside
6. Then look at the preparation method of walnut filling. Slightly break the raw walnut kernels, spread them in a baking tray, put them in a preheated oven at 180℃, bake for 8 minutes, and cool them out of the oven for later use; brown sugar, fine sugar, water, and cut into small pieces of butter are put into a glass bowl together Inside, put it in the microwave on high heat for 1 minute
7. After taking it out, use a manual whisk to stir until the sugar is completely dissolved (if you don't use a microwave oven, you can pour the mixture into a small milk pot, heat it over a low heat and stir continuously until the sugar is completely dissolved); wait until the sugar is cooled to not hot After reaching the level, pour in the beaten egg liquid and stir evenly; pour the roasted walnuts into the egg sugar mixture, mix well and serve as walnut filling
8. Pour the walnut filling into the baked pie crust and spread it evenly; place the pie pan on the grill or baking tray, and put it into the preheated oven at 170℃, the second to last layer. Bake for 35 minutes. Wait to be cooled, demoulded and cut into pieces, ready to eat


Tips: 1. A little cocoa powder is added to the pie crust, just to make the color of the pie crust darker, and to match the color of the walnut filling more harmoniously. You can replace the cocoa powder with the same amount of flour to make a yellow pie crust;
2. The pie crust needs to be baked first, and then the walnut filling is added for the second baking. When baking the pie crust alone, in order to prevent the pie crust from bulging, spread oil paper or tin foil on the pie crust, and put heavy objects such as beans or clean pebbles on the pie crust. You can choose heavy objects according to your own conditions, as long as they are of the right size and resistant to baking;
3. The taste of brown sugar is very strong, so instead of using all brown sugar in the recipe, brown sugar and some fine sugar are used. Friends who like the rich flavor of brown sugar can replace the fine sugar with the same amount of brown sugar (that is, all brown sugar is used in the formula);
4. The walnut filling must be filled. The egg syrup will deposit on the bottom of the pie filling, so the pie filling is actually divided into two parts. The bottom half is the walnuts soaked in the egg syrup. After baking, the egg syrup is solidified and the taste is very soft and rich. The upper part is the walnut with only the skin dipped in egg sugar liquid. After baking, it will become very crispy. It has a wonderful taste and it is worth a try.


 Buy on JD
 Buy on Amazon