Cantonese-style Moon Cakes

by Yaya Yang Xiaochu

4.6 (1)
Favorite
9

Difficulty

Normal

Time

10m

Serving

2

Cantonese-style mooncakes can also have beauty. [呲牙]The mold used is Xuechu’s 50g pink crystal mold. The pattern of each mooncake is so clear that I don’t want to choose a difficult householder. I don’t hesitate or disturb. Hua Pian made a moon cake [squeeze eyes][squeeze eyes][squeeze eyes]

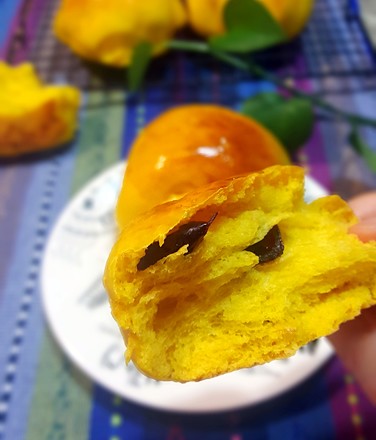
The most favorite among mooncakes is the Cantonese-style mooncakes. The luster of the mooncakes after returning to the oil is attractive, soft and moist, with the fragrance of the crust, the moderate sweetness of the bean paste, the salty egg yolk, and the multiple flavors tempt your taste buds. I like the pink mooncakes so much, I ate two of them before I could get my oil back [cover face][cover face]"

Cantonese-style Moon Cakes

1. Add liquid soap to the syrup and mix well

2. Add peanut oil to the syrup and continue mixing until no peanut oil is visible floating on the syrup

3. Add salt and continue mixing

4. Add flour

5. Press with a spatula to form a ball

6. Pack it in a fresh-keeping bag and send it to the refrigerator to wake up for 2-3 hours

7. In the process of waking up the noodles, you can prepare the filling part. Weigh the lotus seed paste and the egg yolk together, weigh out 35 grams of the lotus seed paste, press into slices, and wrap the egg yolk.

8. Wrap all the fillings and cover with plastic wrap for use

9. Press the pie crust to open

10. Flatten the mooncake crust and place the filling on the crust

11. Tuck the pie crust with a tiger's mouth and round it

12. Put the mooncakes in the flour and roll them around

13. Take out the mooncake and pat off the excess flour on the surface

14. The mold is filled with flower pieces, put in a little flour and roll around, then knock out the flour

15. Put the moon cake into the mold

16. The time to press the pattern should be skillful, not full force.

17. The pattern that is easily pressed is very clear and beautiful. If the crust is oily enough, it can be directly sent into the preheated oven.

18. Bake at 160°C and 130°C for 8 minutes

19. Beat the eggs, add 1:1 water, and sieve again for use

20. Take it out, let it cool for a while, and gently brush with a layer of egg wash

21. Put it in the oven again and bake it for 15 minutes at 160°C and 130°C

22. The finished product is out of the oven. I personally like a tender color, but don’t like the color too dark. If you like the color to be darker, you can bake it according to your personal preference.

23. within Temptation

24. Hazy beauty

25. Contrast between hazy and clear

26. Contrast between hazy and clear

27. Hazy beauty

28. Hazy beauty

Tips:

1. The process of emulsifying syrup must be emulsified in place, and the syrup will be filled with small bubbles
2. The recipe I made is 50 grams. If you use the ratio of 3:7, you can make about 10. I like the ratio of 2:8. This can be done according to my personal preference.
3. If the crust is a bit dry before being put into the oven, spray a little water on the watering can. This recipe does not require spraying water.
4. (This temperature is for reference only, please adjust according to the temperature of your own oven)

Comments

Similar recipes

Sausage and Vegetable Scones

Low-gluten Flour, Corn, Butter

Soup Type Soft Bread

Milk Powder, Low-gluten Flour, Salt

Seasonal Vegetable Patties [baby Food Supplement]

Minced Meat, Low-gluten Flour, Shiitake Mushrooms

Seasonal Vegetable Tempura

Onion, Eggplant, Dried Shiitake Mushrooms

Tyrannosaurus Spinach Bread

Low-gluten Flour, Egg, High-gluten Flour

Vegan Banana Cakes

Low-gluten Flour, Whole Wheat Flour, Coffee Powder

Pumpkin Cranberry Bread

Pumpkin Puree, Low-gluten Flour, Egg