Lemon Strawberry Tart
1.
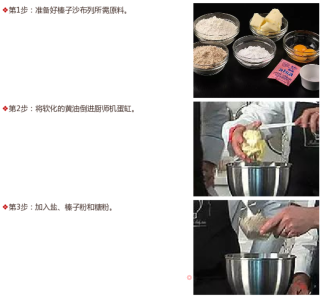
Step 1: Prepare the raw materials needed for hazelnut shabule. Step 2: Pour the softened butter into the egg bowl of the cook machine. Step 3: Add salt, hazelnut powder and powdered sugar.
2.
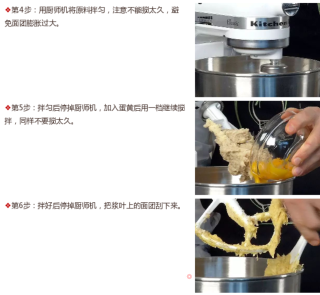
Step 4: Use a cook machine to mix the ingredients evenly. Be careful not to stir for too long to avoid excessive expansion of the dough. Step 5: After mixing well, stop the cook machine, add the egg yolk and continue to stir at the first gear without stirring for too long. Step 6: After mixing, stop the cook machine and scrape off the dough on the paddle.
3.
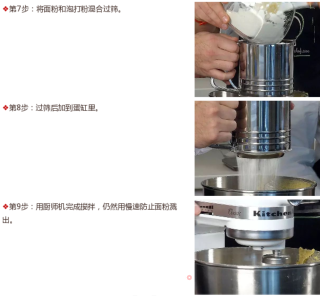
Step 7: Mix the flour and baking powder through a sieve. Step 8: After sieving, add to the egg tank. Step 9: Use the chef's machine to complete the mixing, and still use a slow speed to prevent the flour from spilling.
4.
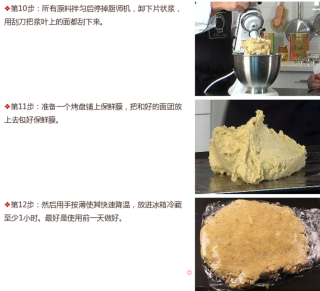
Step 10: After mixing all the ingredients, stop the cook machine, remove the flaky pulp, and scrape off the surface of the blade with a spatula. Step 11: Prepare a baking tray and cover it with plastic wrap, put the dough on it and wrap it with plastic wrap. Step 12: Then press the thin film with your hand to quickly cool down, and put it in the refrigerator for at least 1 hour. It is best to make it one day before use.
5.
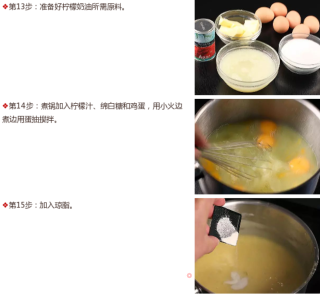
Step 13: Prepare the ingredients needed for the lemon cream. Step 14: Add lemon juice, soft white sugar and eggs to the boiling pot, boil over a low fire and stir with egg whips. Step 15: Add agar.
6.
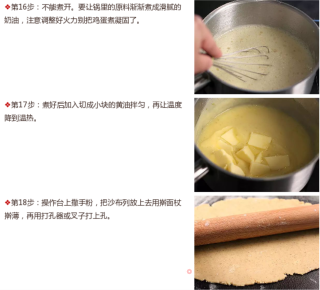
Step 16: Cannot boil. Let the ingredients in the pot gradually boil into creamy cream, pay attention to adjust the heat so that the eggs do not solidify. Step 17: After cooking, add the butter into small pieces, mix well, and then let the temperature drop to warm. Step 18: Sprinkle hand powder on the operating table, put the shabule on it and roll it thin with a rolling pin, and then punch a hole with a punch or fork.
7.
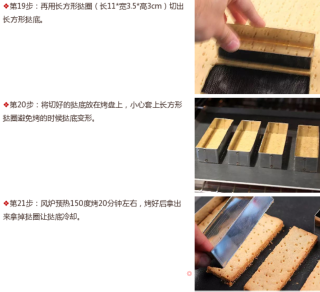
Step 19: Use a rectangular tart ring (length 11*width 3.5*height 3cm) to cut out the bottom of the rectangular tart. Step 20: Place the cut bottom of the tart on the baking tray, carefully put on the rectangular tart ring to avoid deformation of the bottom of the tart when baking. Step 21: Preheat the air oven to 150 degrees and bake for about 20 minutes. After baking, take out the tart ring and let the tart bottom cool.
8.
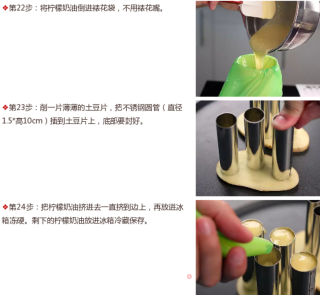
Step 22: Pour the lemon butter into the piping bag without a piping mouth. Step 23: Peel a thin potato slice, insert a stainless steel tube (diameter 1.5*height 10cm) into the potato slice, and seal the bottom. Step 24: Squeeze the lemon butter into the side until it reaches the side, then put it in the refrigerator and freeze it hard. Put the remaining lemon cream in the refrigerator and keep it cool.
9.
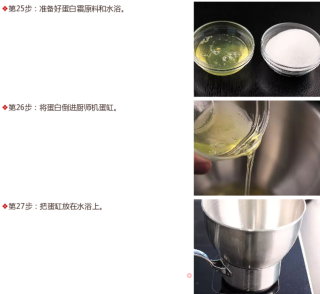
Step 25: Prepare meringue ingredients and water bath. Step 26: Pour the egg whites into the egg tank of the cook machine. Step 27: Put the egg bowl on the water bath.
10.
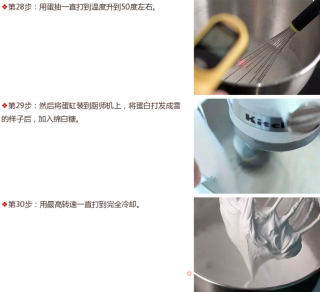
Step 28: Beat with egg soot until the temperature rises to about 50 degrees. Step 29: Then install the egg bowl on the cook machine, and after the egg whites are beaten into snow, add soft white sugar. Step 30: Use the highest speed to beat until it is completely cooled.
11.
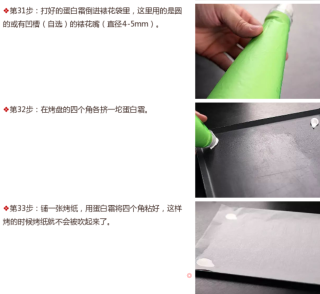
Step 31: Pour the whipped meringue into the piping bag, here is a round or grooved (optional) piping nozzle (diameter 4-5mm). Step 32: Squeeze a puff of meringue on each of the four corners of the baking tray. Step 33: Lay a piece of baking paper and glue the four corners with meringue so that the baking paper will not be blown up when baking.
12.
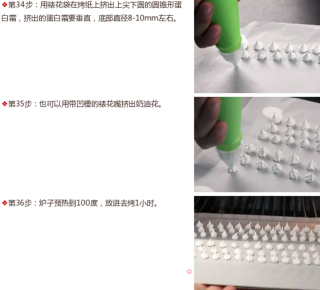
Step 34: Use a piping bag to squeeze out a cone-shaped meringue with the top tip and the bottom round on the baking paper. The extruded meringue should be vertical and the bottom diameter is about 8-10mm. Step 35: You can also squeeze the butter flower with a grooved decorating nozzle. Step 36: Preheat the stove to 100 degrees, put it in and bake for 1 hour.
13.
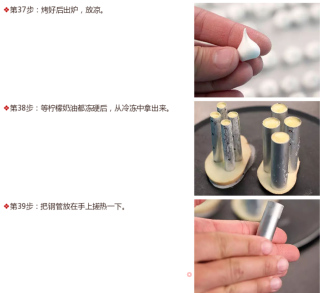
Step 37: After baking, let it out and let cool. Step 38: After the lemon butter is frozen hard, take it out of the freezer. Step 39: Put the steel pipe on your hand and rub it to heat it up.
14.
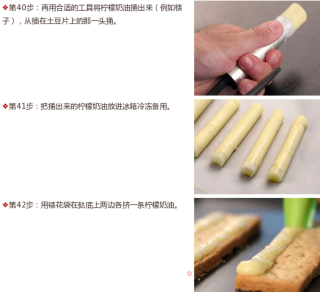
Step 40: Use a suitable tool to poke out the lemon butter (for example, chopsticks), from the end that is inserted on the potato chips. Step 41: Put the poked lemon cream in the refrigerator and freeze for later use. Step 42: Use a piping bag to squeeze a strip of lemon cream on each side of the tart bottom.
15.
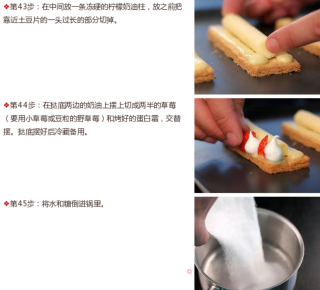
Step 43: Put a frozen lemon butter column in the middle, and cut off the long part near the potato slices before putting it. Step 44: On the cream on both sides of the bottom of the tart, place the cut strawberries in half (use small strawberries or wild strawberries with beans) and the roasted meringue, alternately. Set the bottom of the tart and refrigerate for later use. Step 45: Pour water and sugar into the pot.
16.
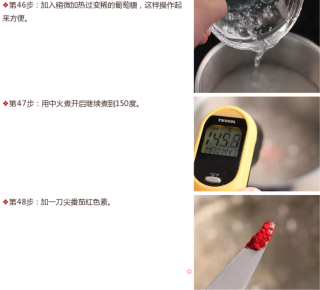
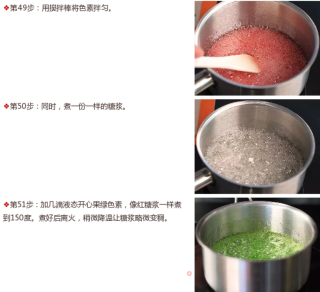
Step 46: Add the slightly heated and thinned glucose, which is convenient to operate. Step 47: Bring to a boil over medium heat and continue to cook to 150 degrees. Step 48: Add a knife-tip tomato red pigment.
17.
Step 49: Use a stirring rod to mix the pigments well. Step 50: At the same time, cook the same syrup. Step 51: Add a few drops of liquid pistachio green pigment and cook to 150 degrees like red syrup. After cooking, remove from heat and cool down slightly to thicken the syrup slightly.
18.
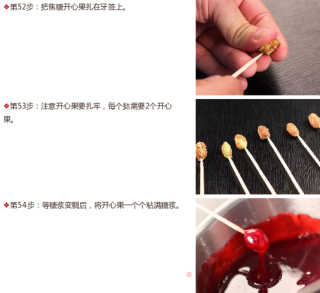
Step 52: Stick the caramelized pistachios on the toothpicks. Step 53: Note that the pistachios must be firmly planted. Each tart requires 2 pistachios. Step 54: After the syrup thickens, fill the pistachios one by one with the syrup.
19.
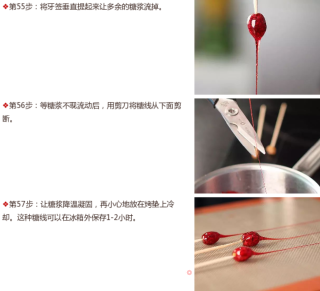
Step 55: Lift the toothpick vertically to let the excess syrup drain off. Step 56: After the syrup does not flow, use scissors to cut the sugar thread from below. Step 57: Let the syrup cool down and solidify, and then carefully place it on the baking mat to cool. This sugar thread can be stored outside the refrigerator for 1-2 hours.
20.
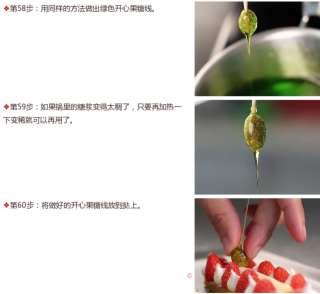
Step 58: Use the same method to make the green pistachio candy thread. Step 59: If the syrup in the pot becomes too thick, just reheat it to thin out and you can use it again. Step 60: Put the prepared pistachio candy line on the tart.
21.
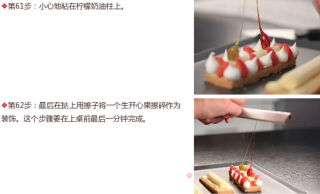
Step 61: Carefully stick to the lemon butter column. Step 62: Finally, use a wiper on the tart to garnish a raw pistachio. This step should be completed at the last minute before serving.
Tips:
The high-value and delicious strawberry lemon tart making process is also a kind of beautiful enjoyment. After finishing it, taste it for yourself and share it with people you like, just like sharing a cute little love song to add a lot to this beautiful spring day.


